The entire integration process takes less than 10 minutes and completes the automation setup from order to invoice.
If you're looking for an efficient and reliable method to integrate QuickBooks Desktop with your e-commerce order system, this article provides a complete solution. Windingflow supports syncing sales order data to local QuickBooks, enabling automated invoice generation from orders. This integration delivers a powerful order automation experience for businesses using QuickBooks.
Integration Advantages
- Automatically sync e-commerce orders with financial invoices using order automation
- Reduce manual input errors by integrating Windingflow with QuickBooks Desktop
- Improve collaboration between finance and operations through seamless data syncing
- Suitable for on-premise deployment and mid-to-large enterprises seeking reliable QuickBooks integration
If you're already using QuickBooks, you can immediately integrate with Windingflow to enhance your order management automation and streamline financial workflows.
Integration Overview , 8 Steps Total
The entire operation takes less than 10 minutes
- Install QuickBooks Desktop for financial tracking
- Configure basic integration fields in QuickBooks
- Add QuickBooks connection in the Windingflow order system
- Install QuickBooks Web Connector to enable data exchange
- Connect Web Connector to the order automation system
- Sync product data from Windingflow to QuickBooks Desktop
- Send invoice data from order system to QuickBooks
- Use and monitor QuickBooks Web Connector for ongoing sync
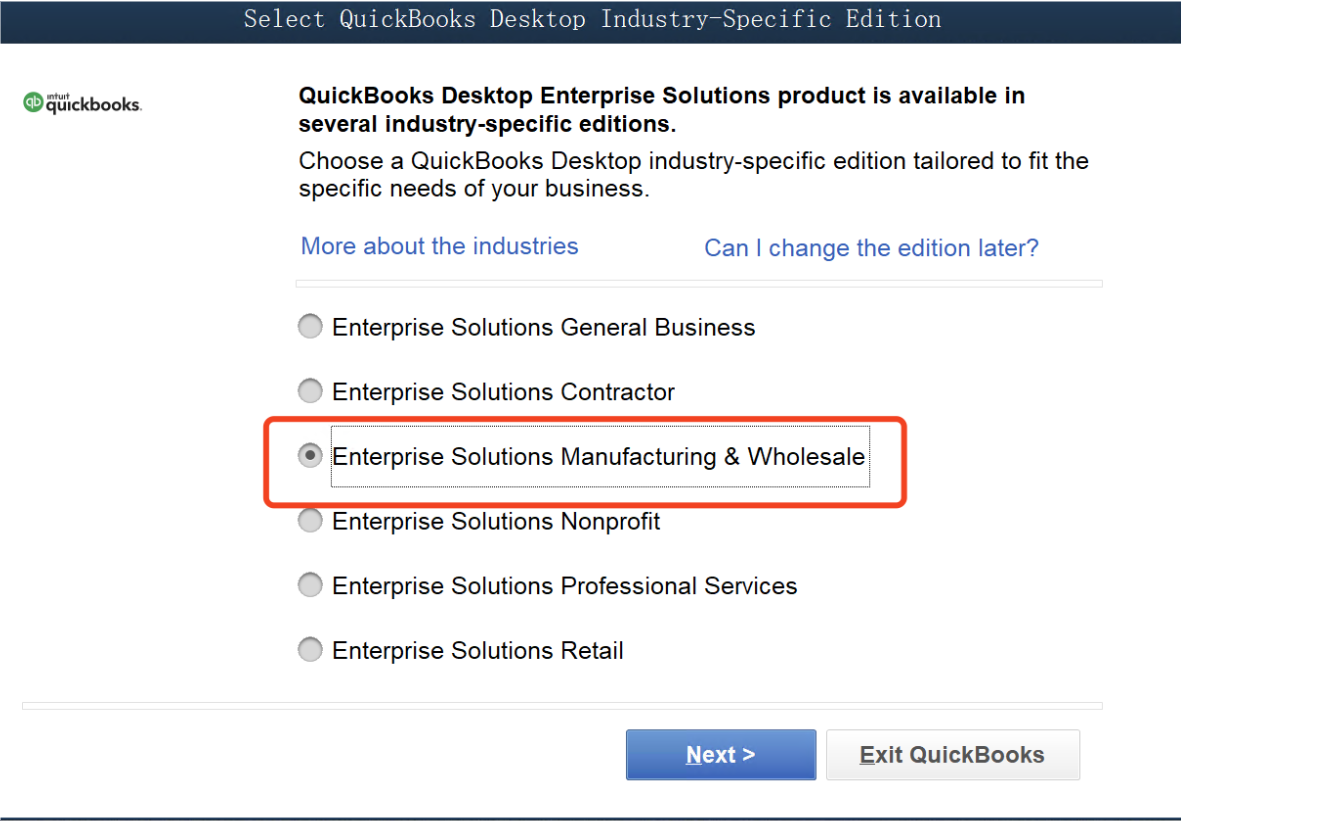
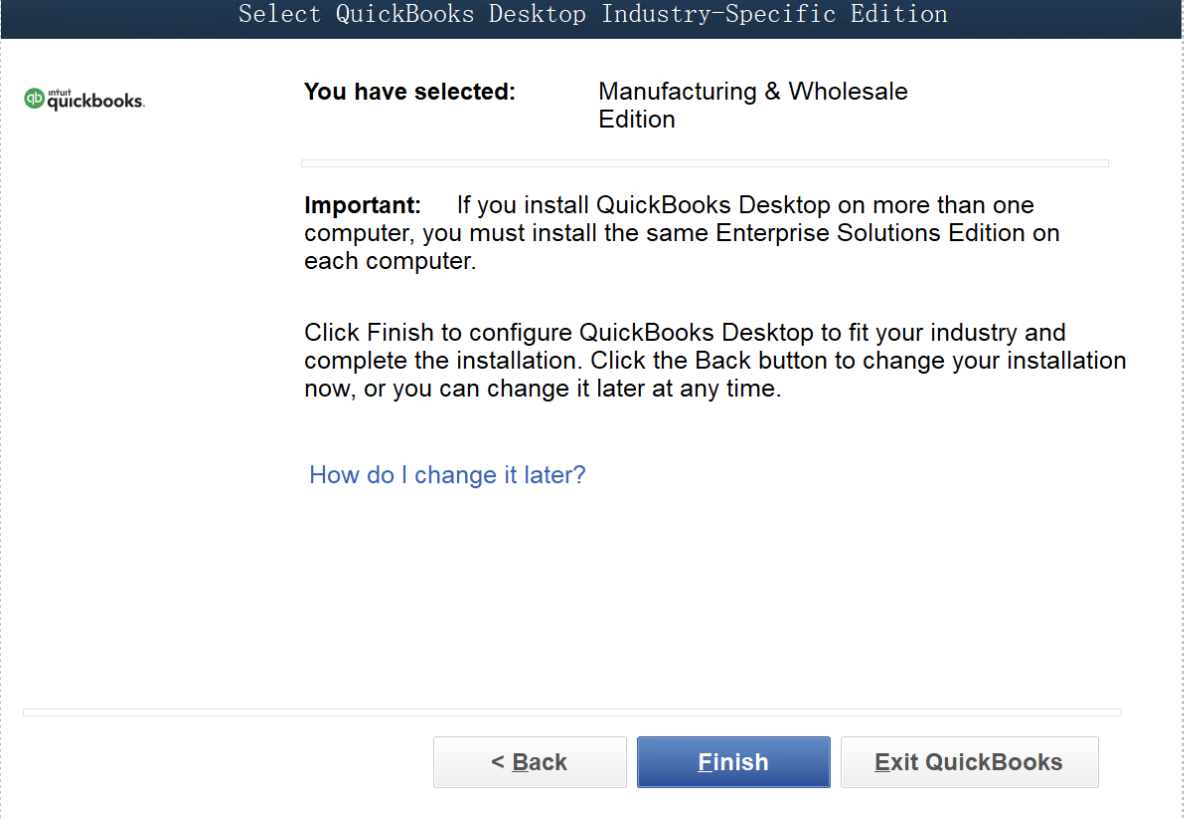
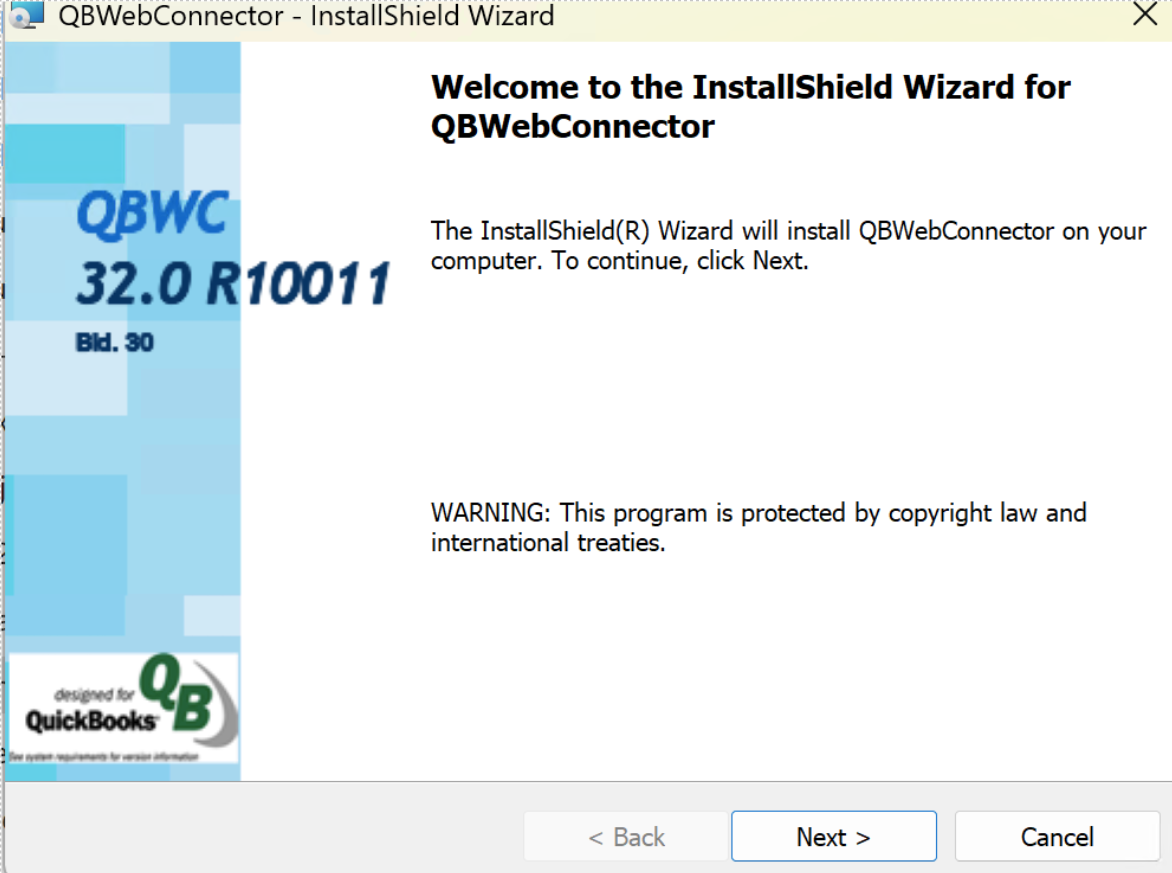
Step 1: Install QuickBooks Desktop
Download link: https://dlm2.download.intuit.com/akdlm/SBD/QuickBooks/2022/Latest/QuickBooksEnterprise22.exe
After downloading, select the default path and follow the prompts to complete the installation.

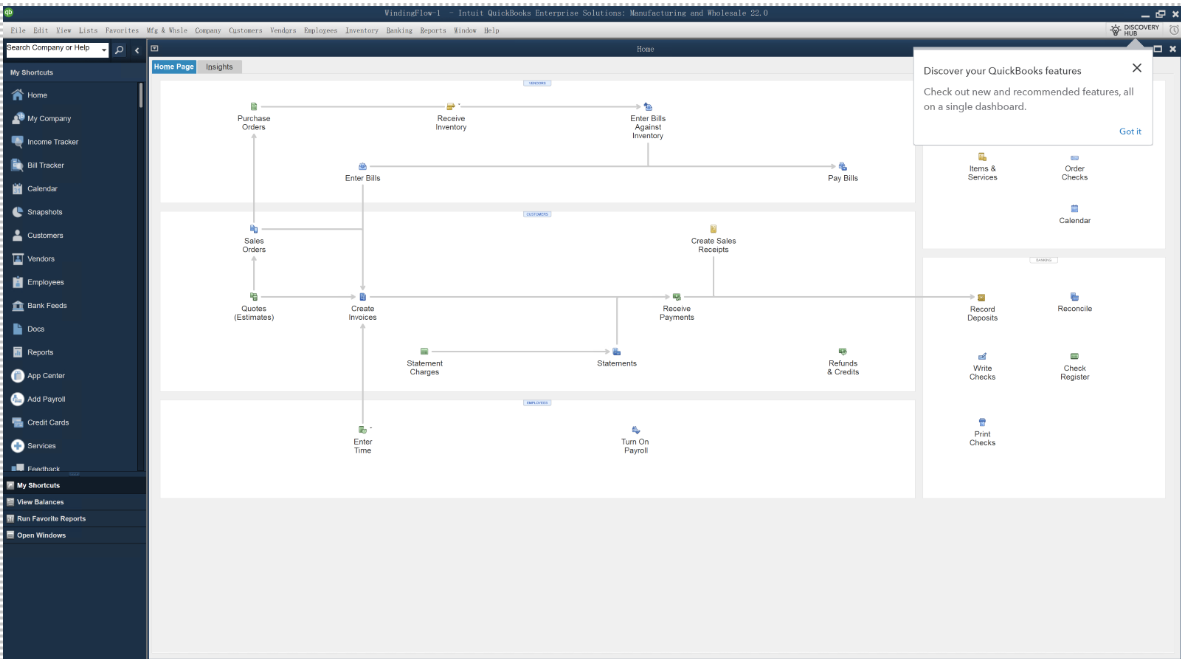
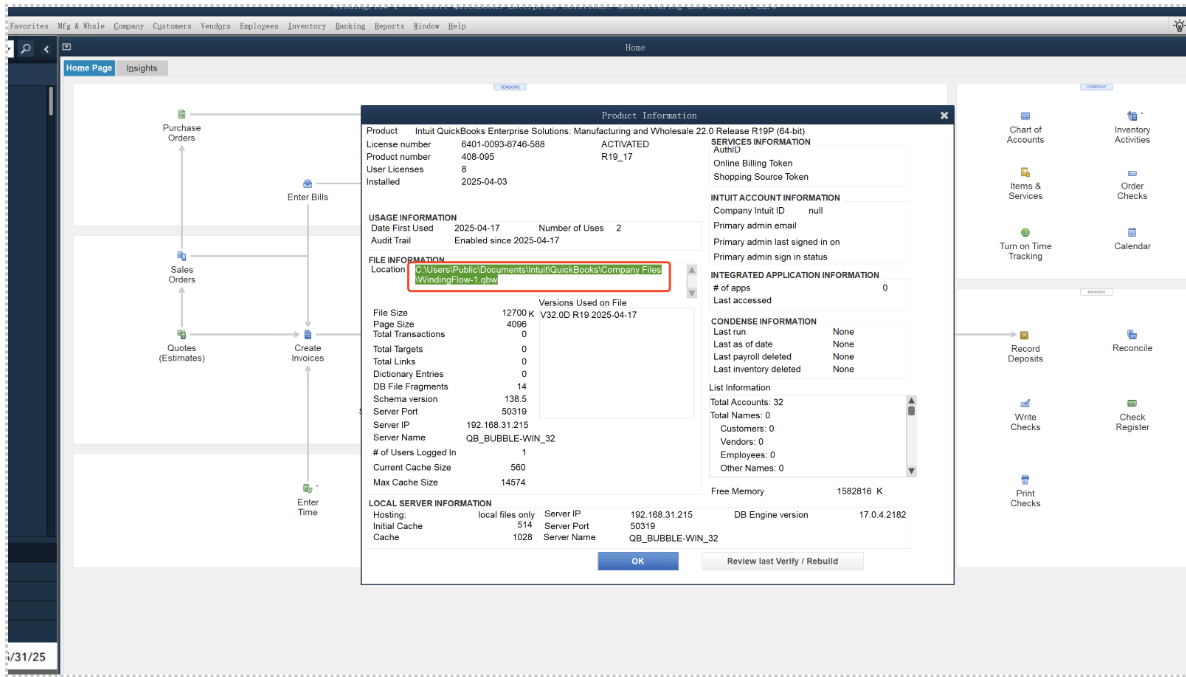
Step 2: Configure Basic Information
To integrate with Windingflow, you need the following key data for order synchronization:
Company File Path: After starting QuickBooks, press F2 (or Fn+F2) to view the path in the pop-up window.
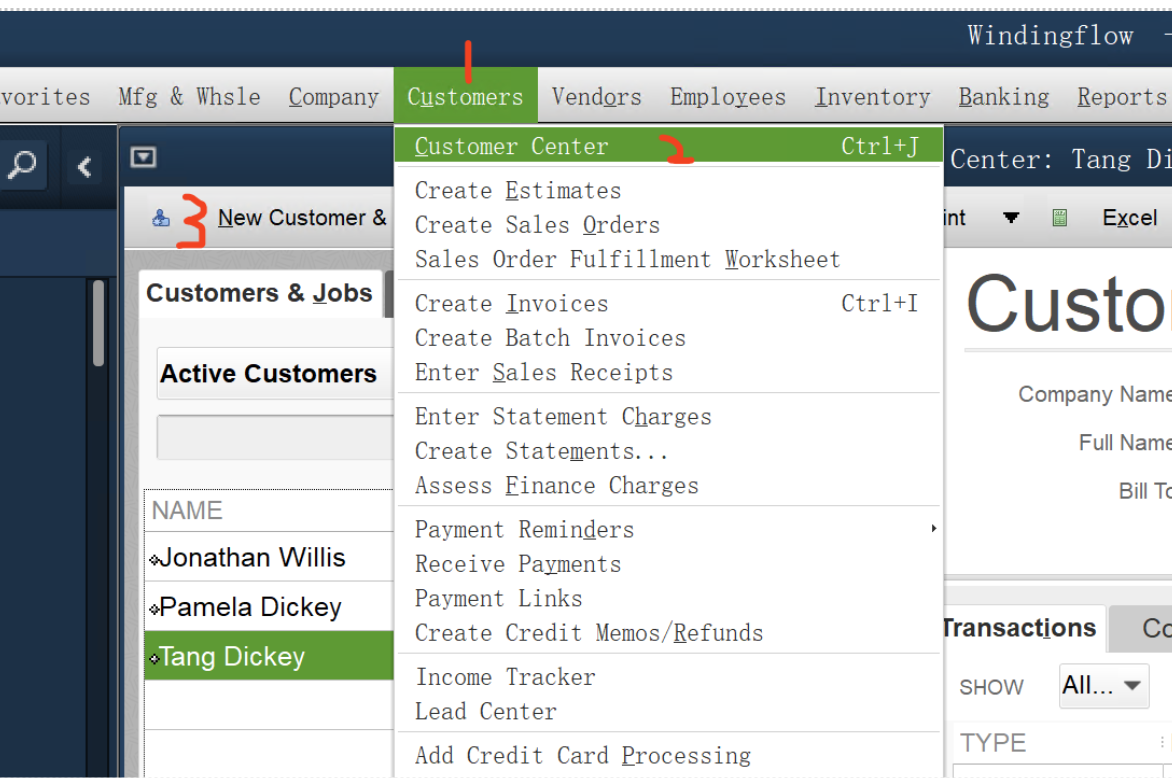
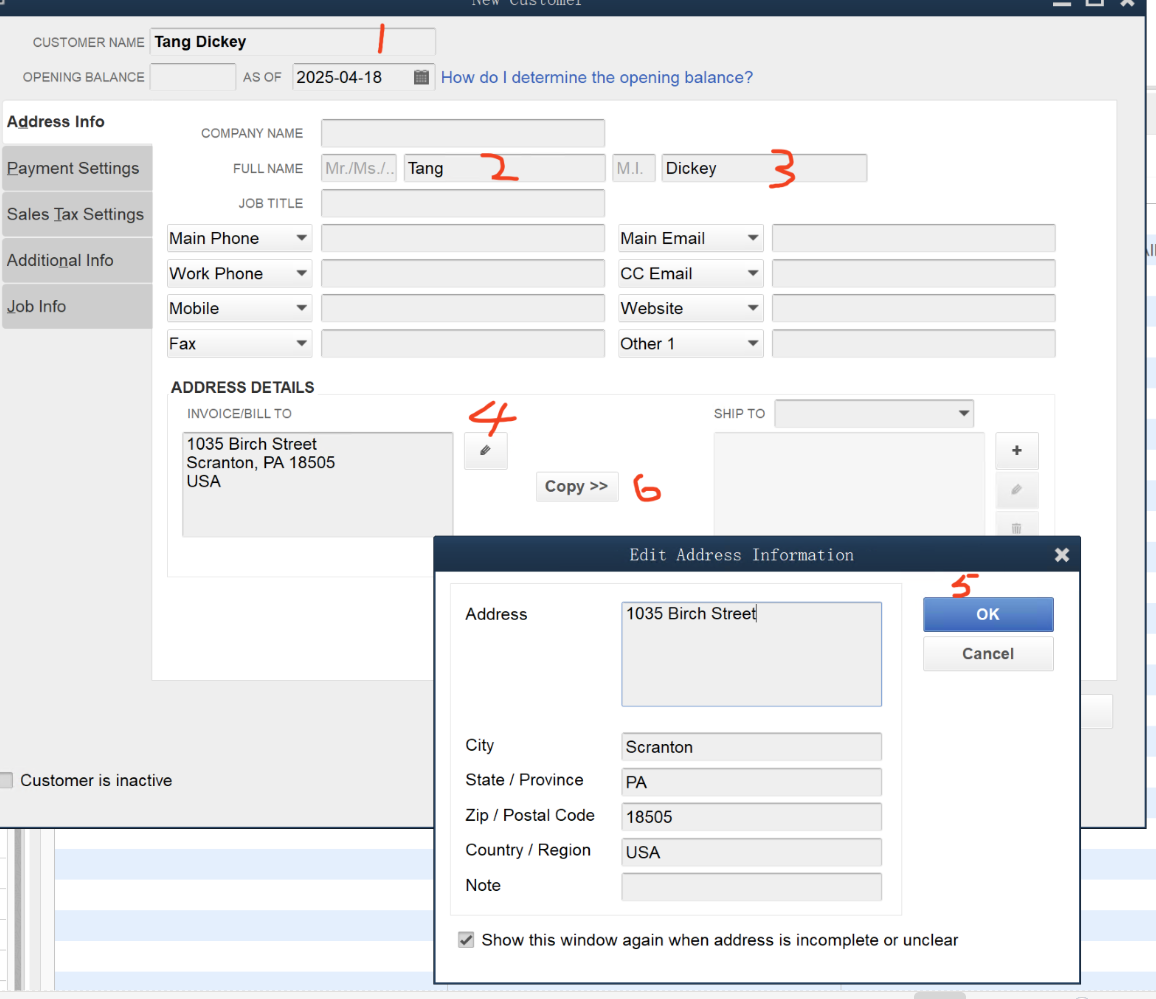
Customer Name: Create a dedicated customer entity for syncing sales orders.
When a sales order syncs to a QuickBooks invoice, it binds to this customer.
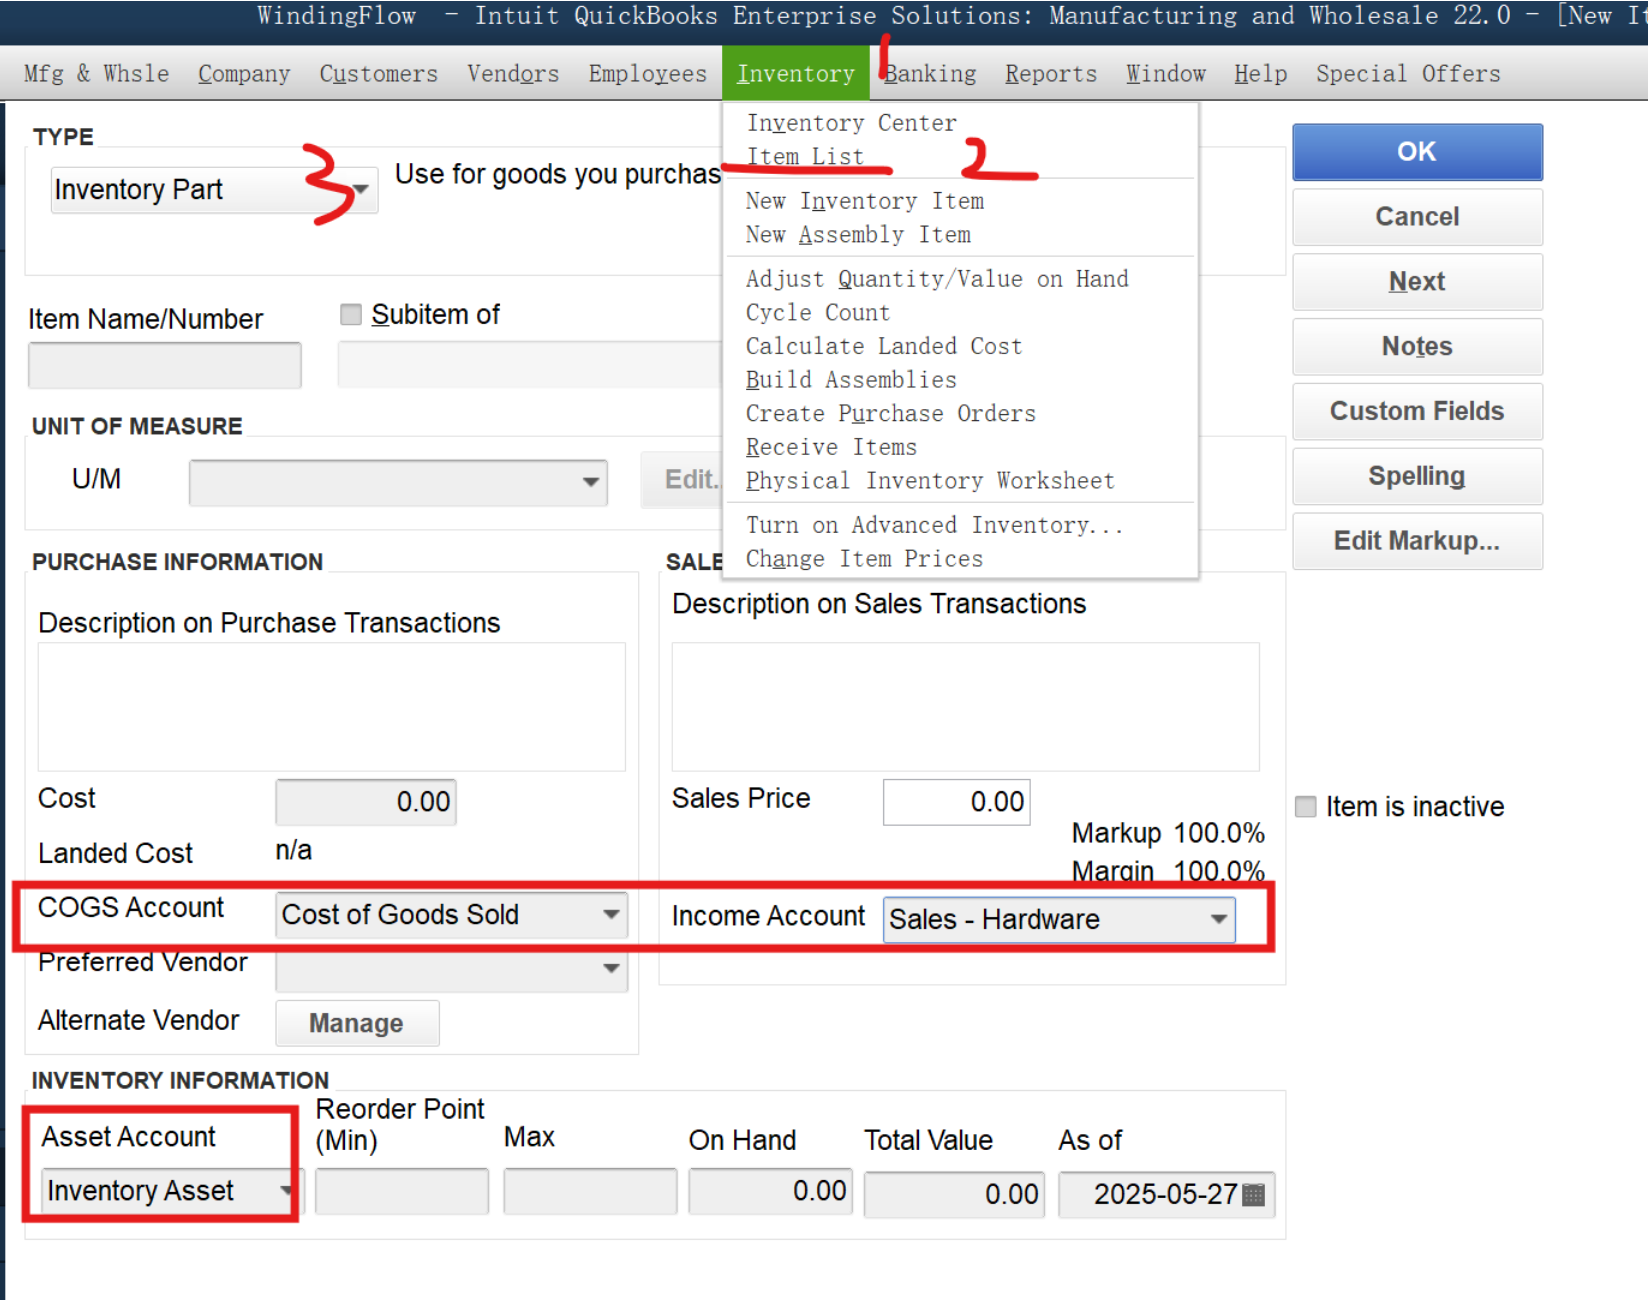
Product Category Accounts: Include income account, cost of goods sold (COGS) account, and asset account.
These accounts are essential for mapping Windingflow product data to QuickBooks financial categories.
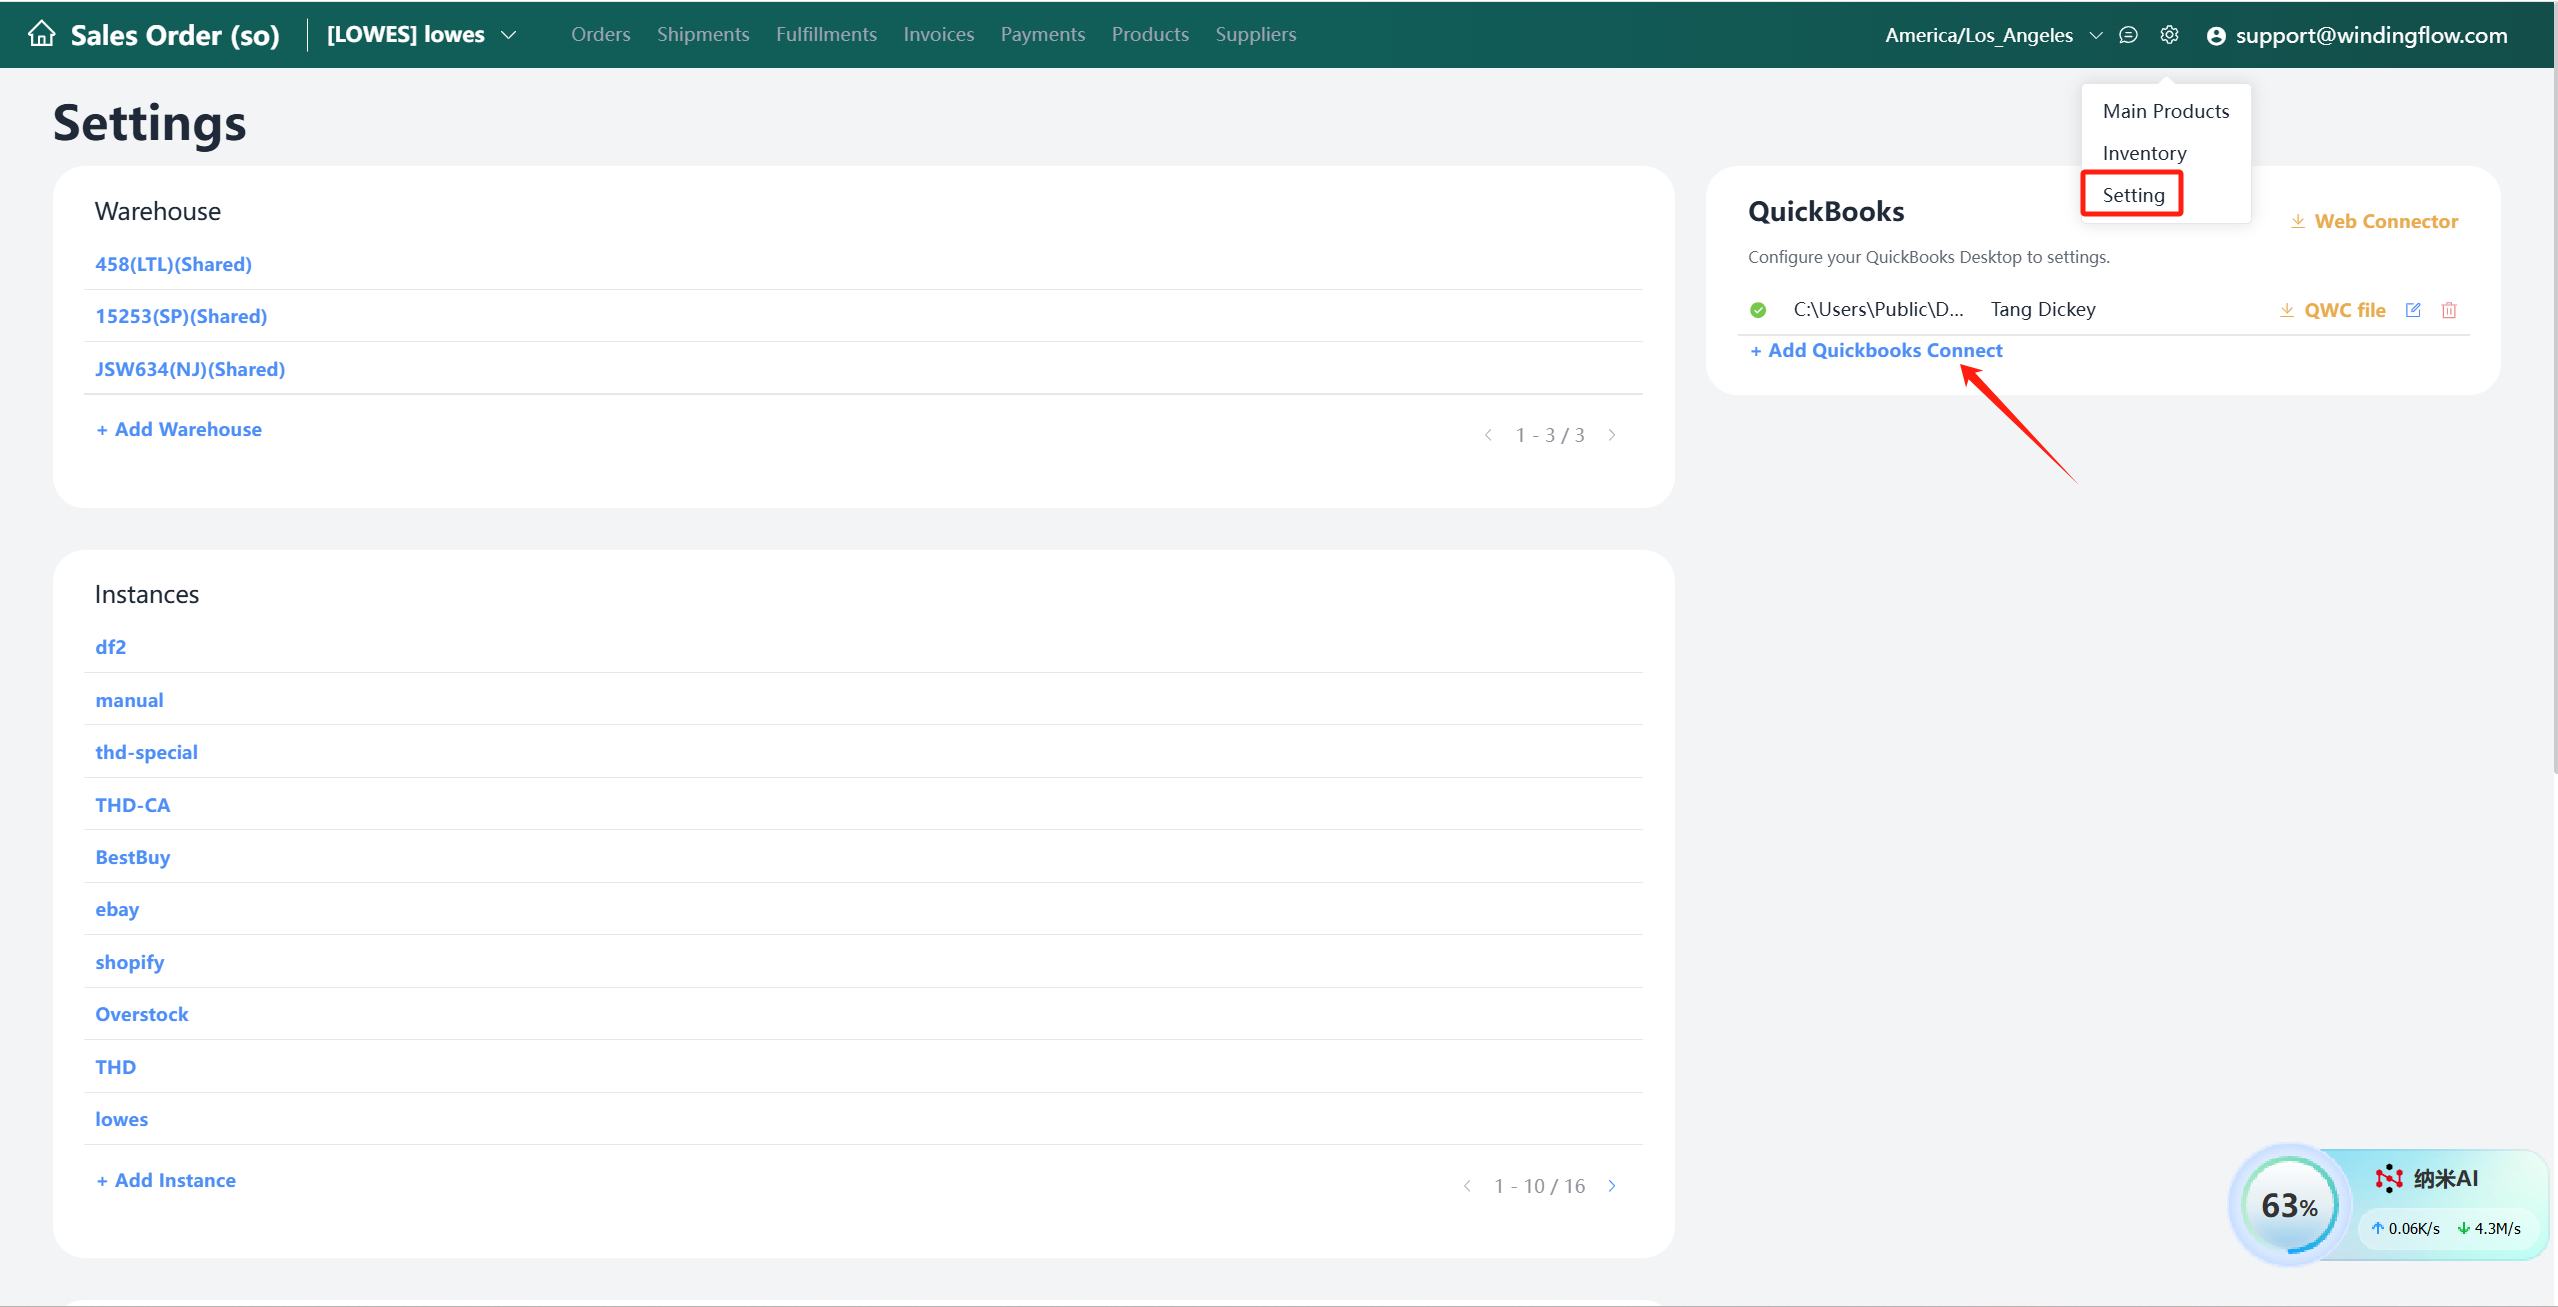
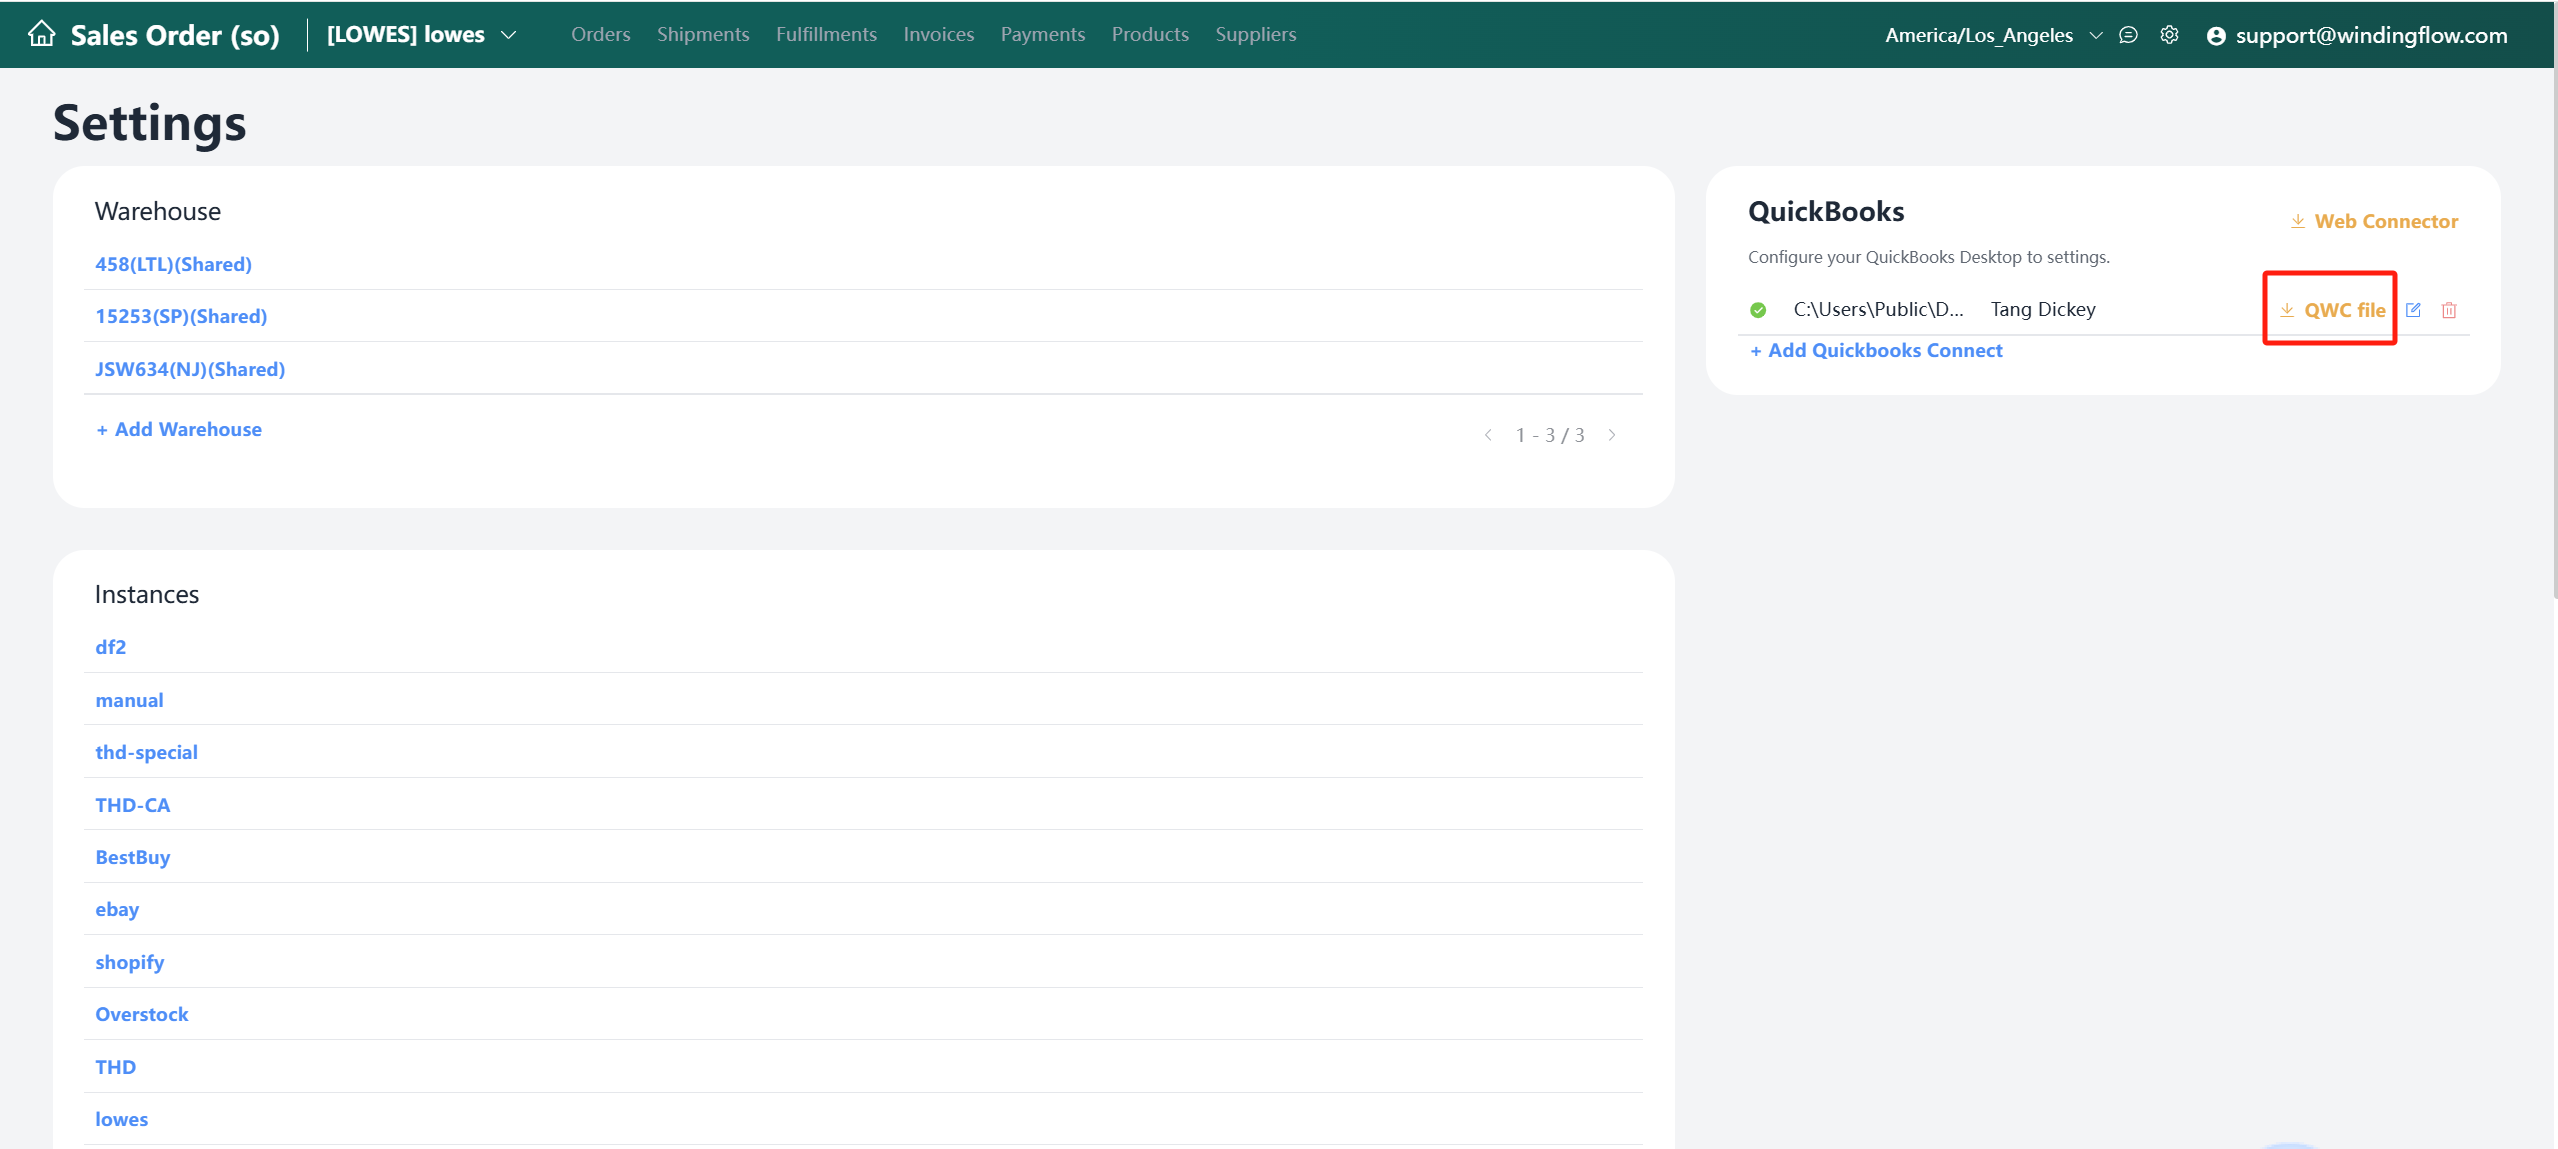
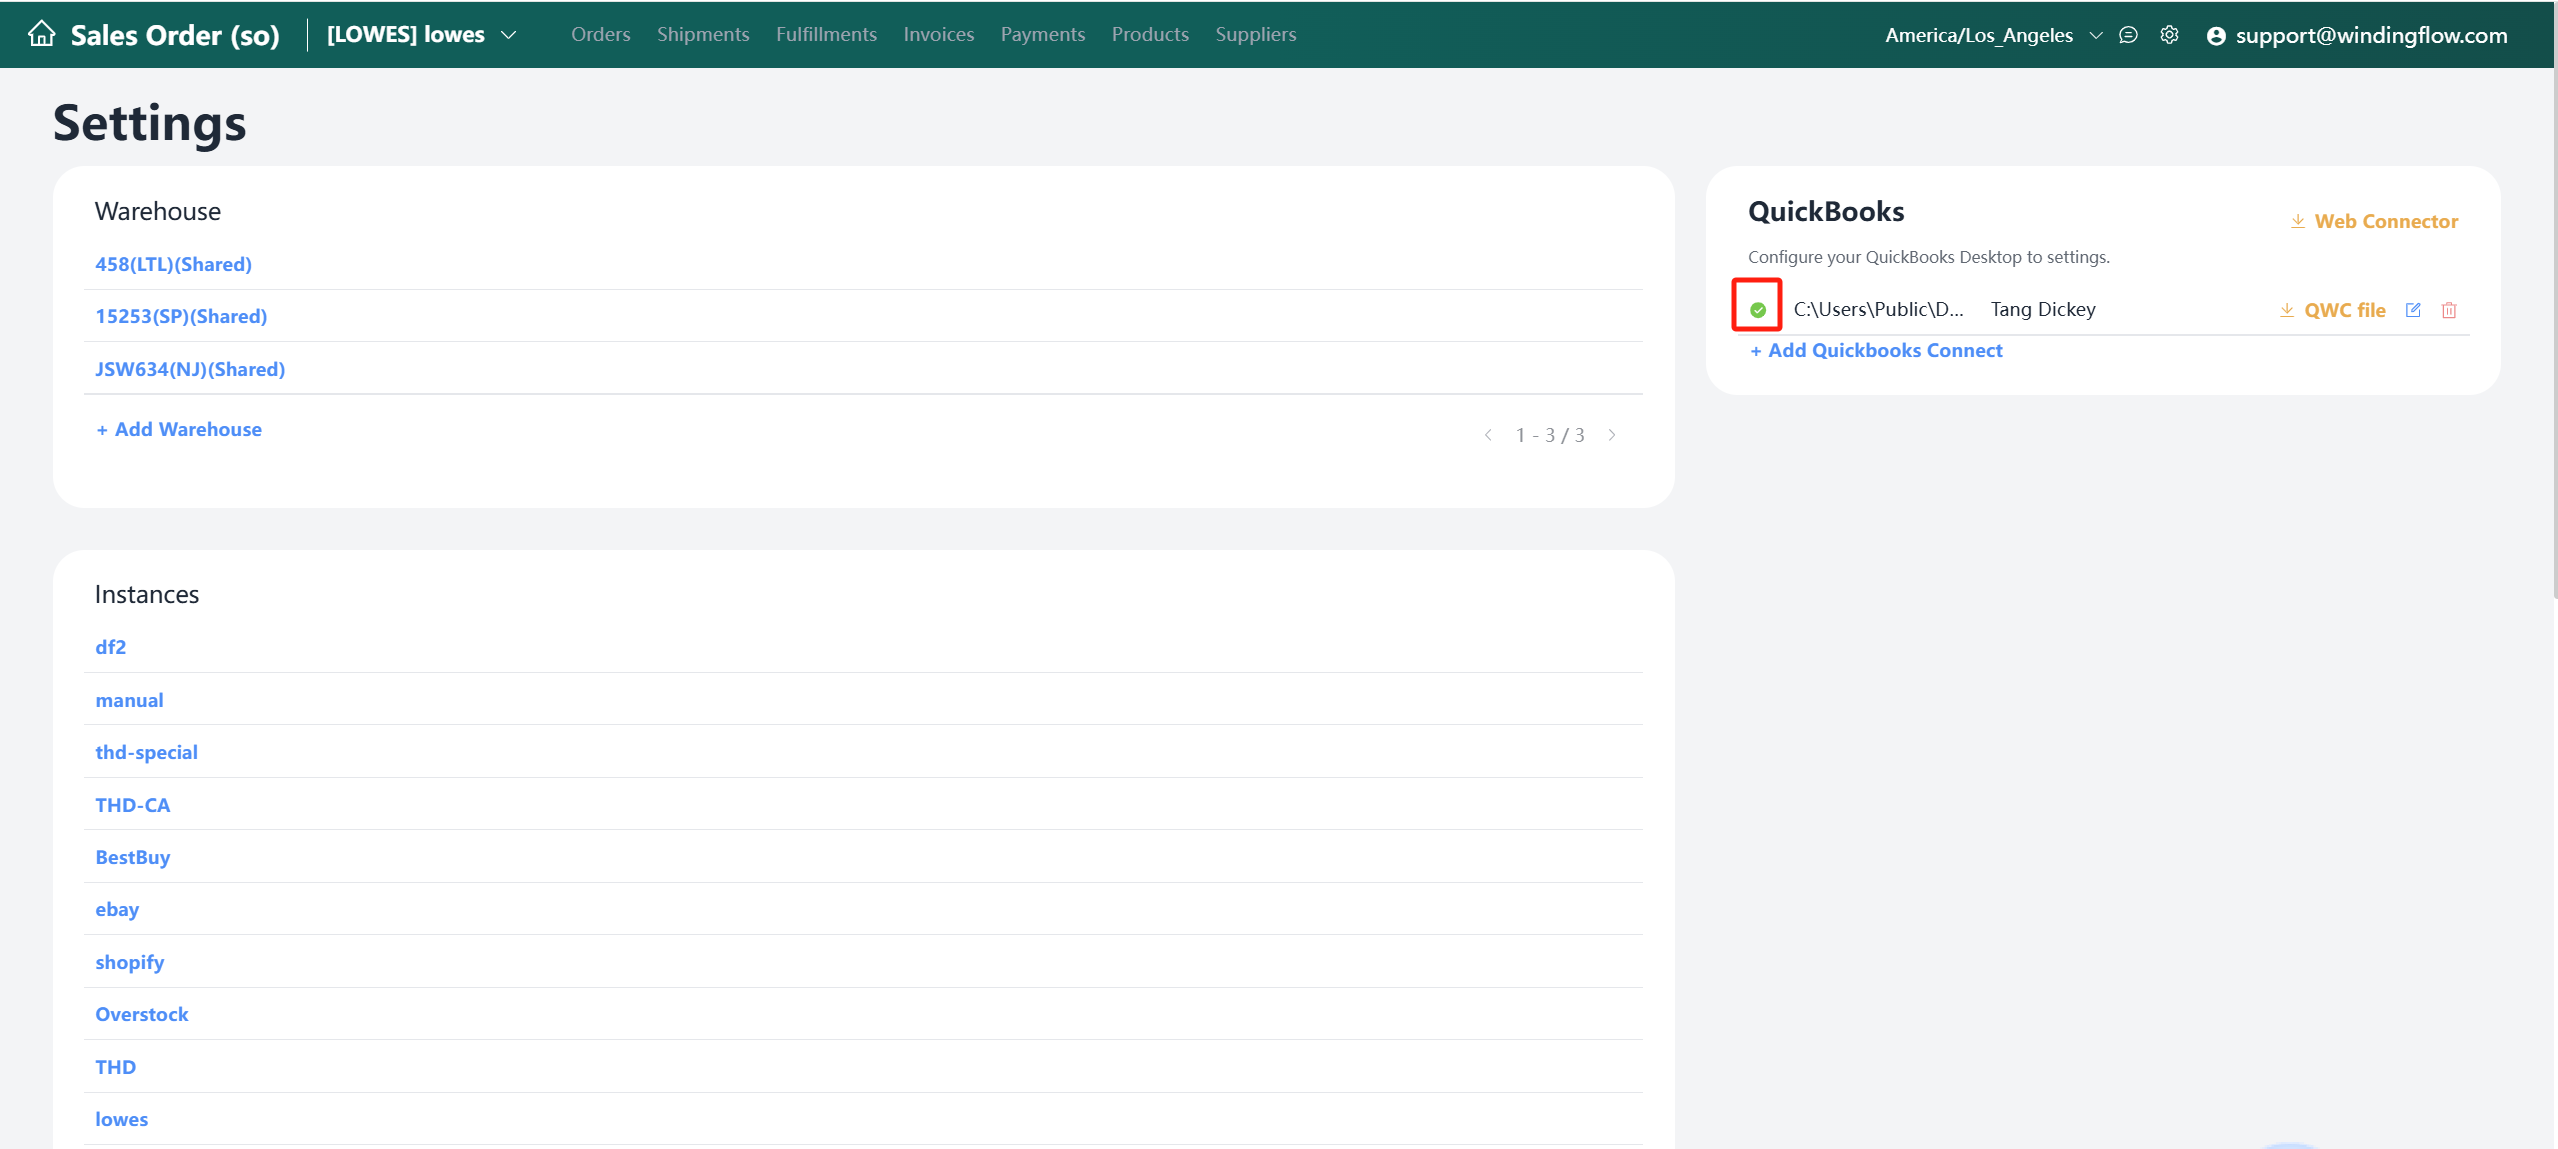
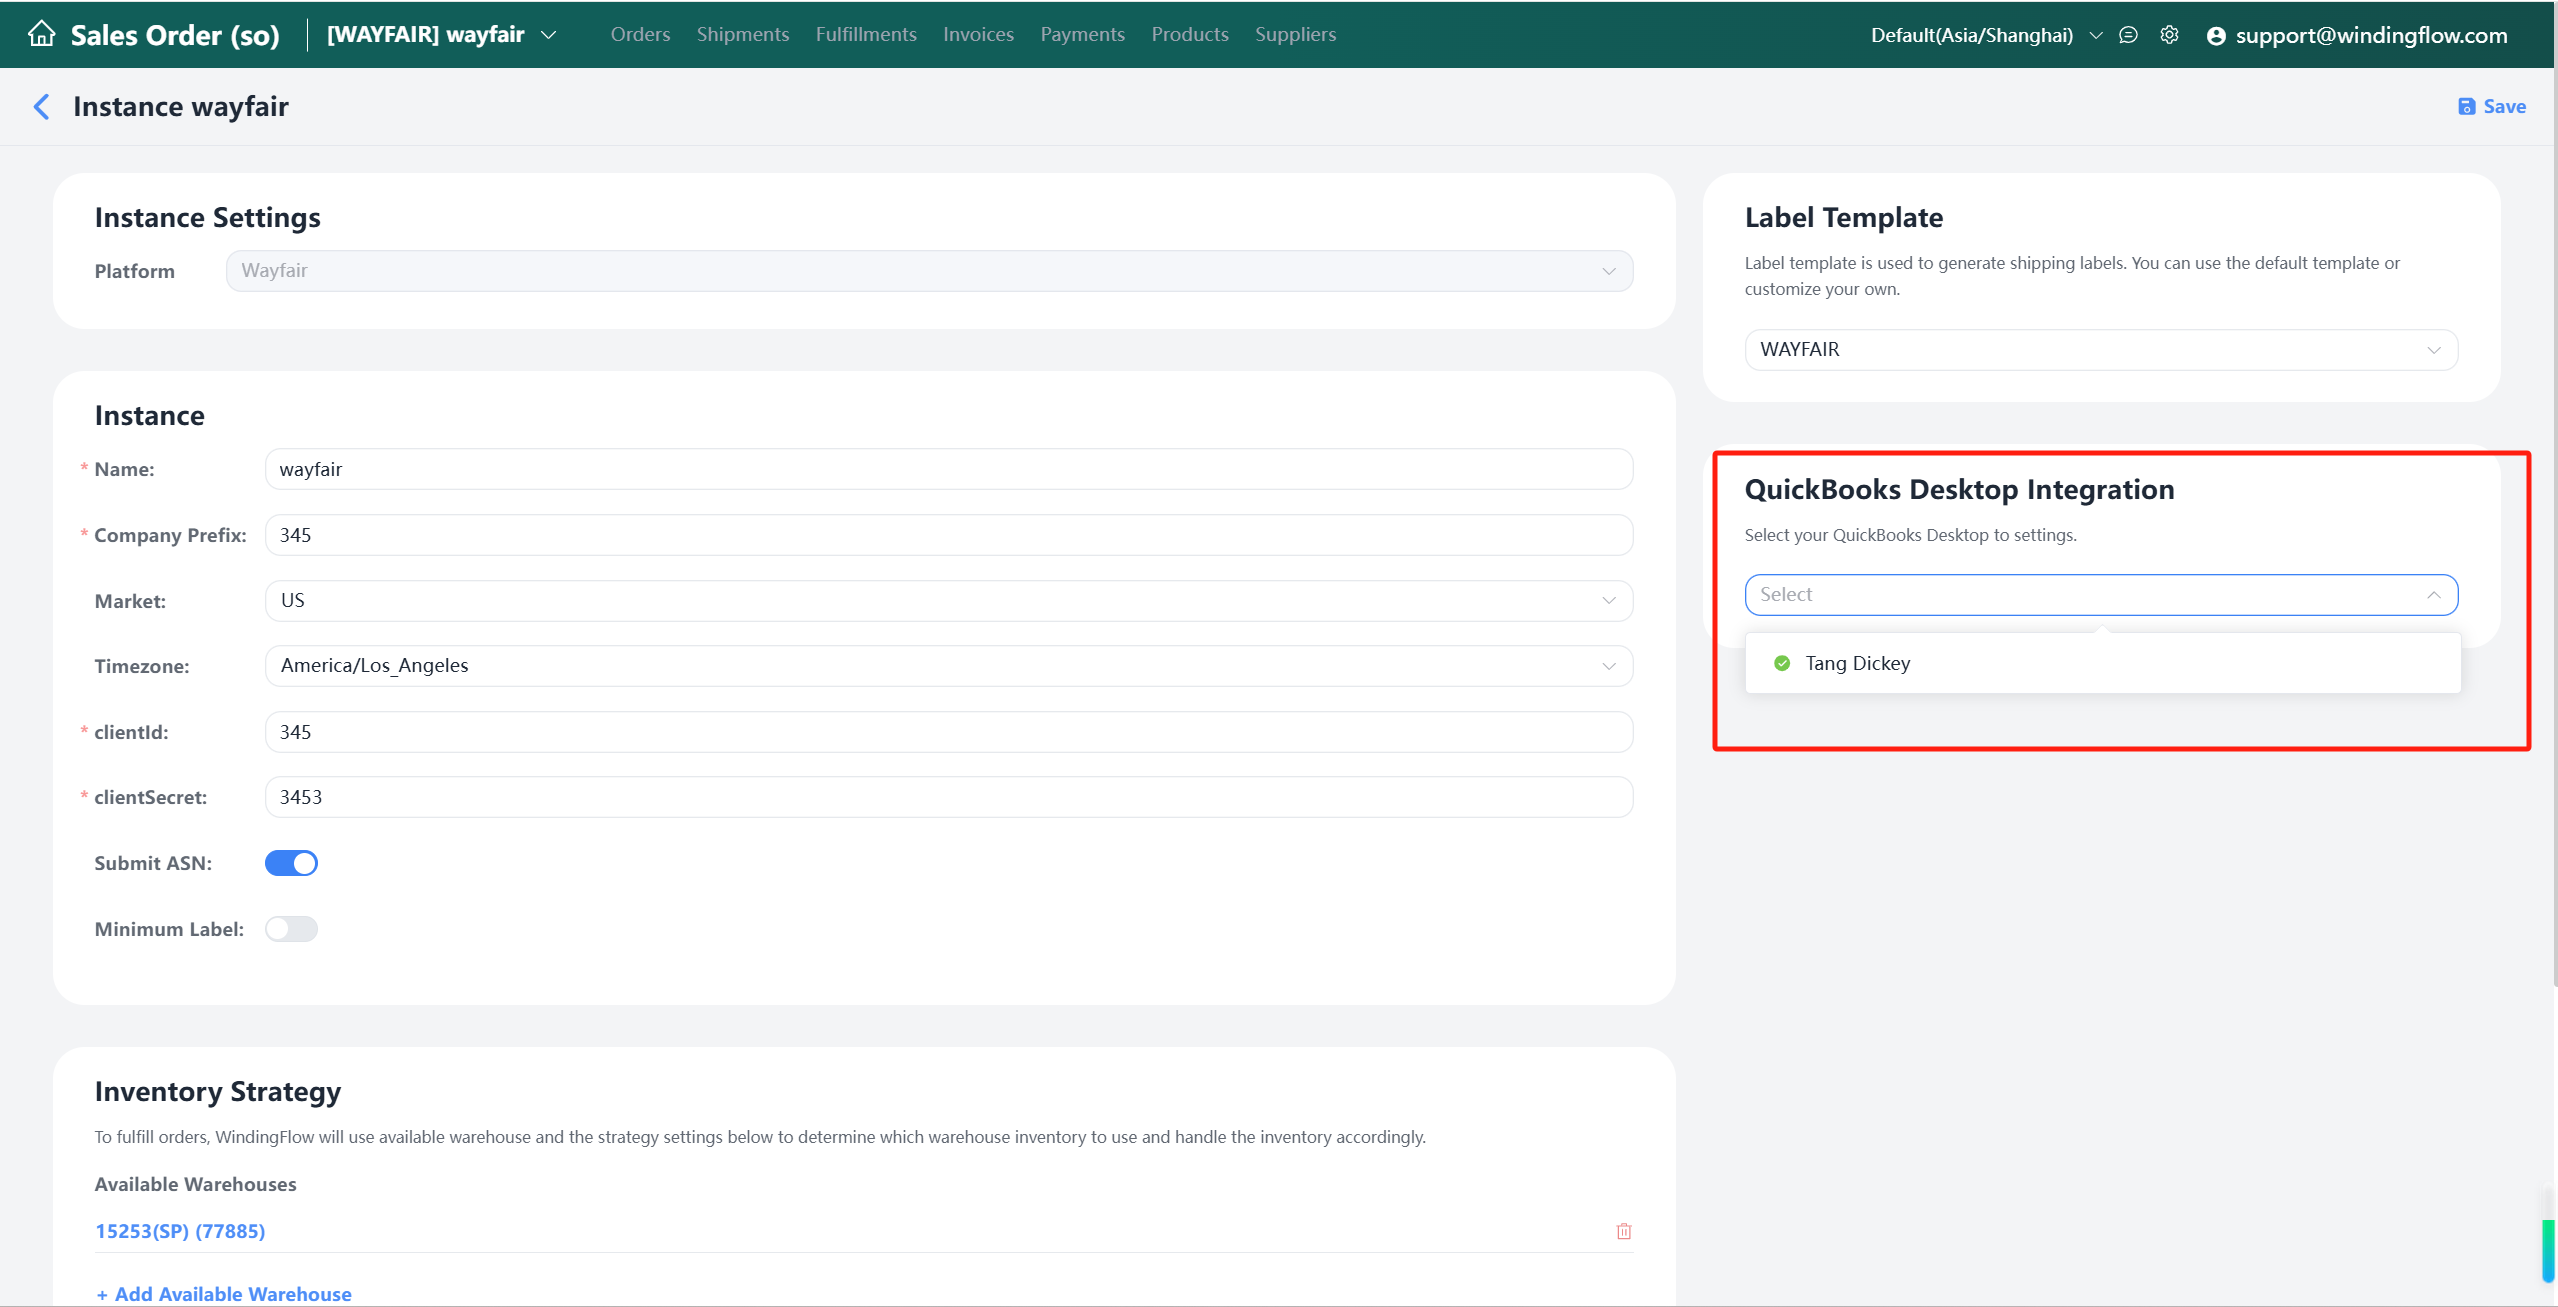
Step 3: Add Connection in Windingflow
Go to the settings module in the order system and click the “Add QuickBooks Connection” button. Fill in the following fields to enable QuickBooks Desktop integration:
- Company file path
- Customer name
- Income account
- COGS account
- Asset account

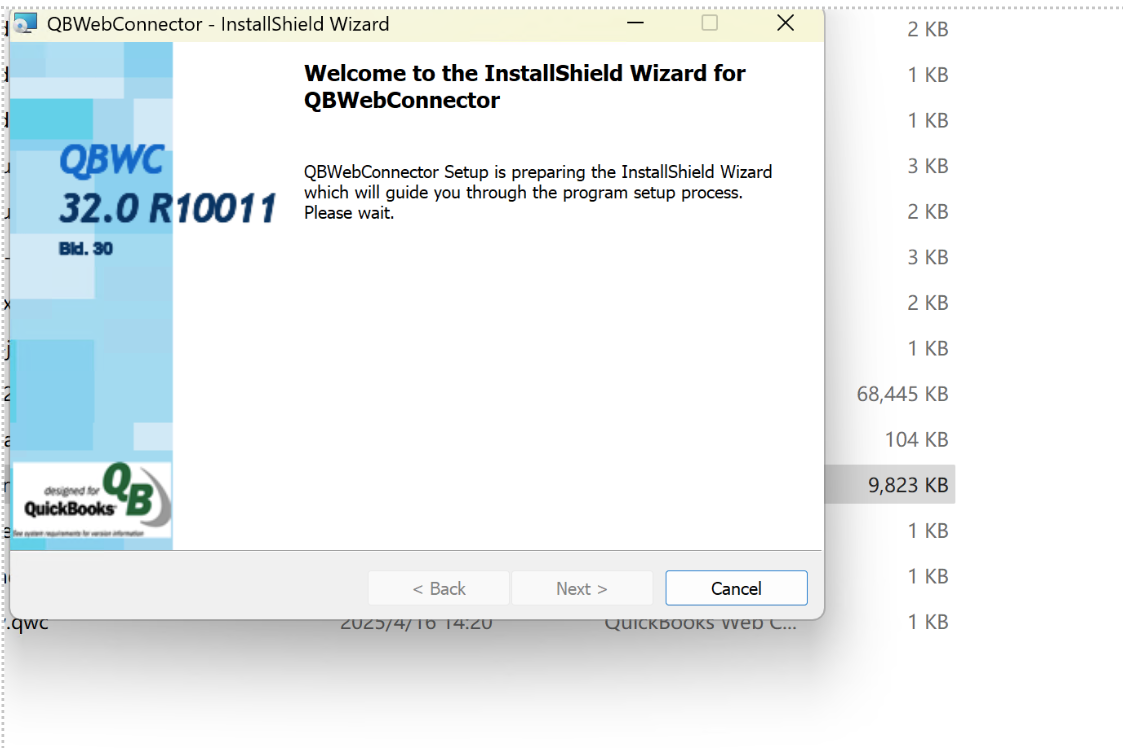
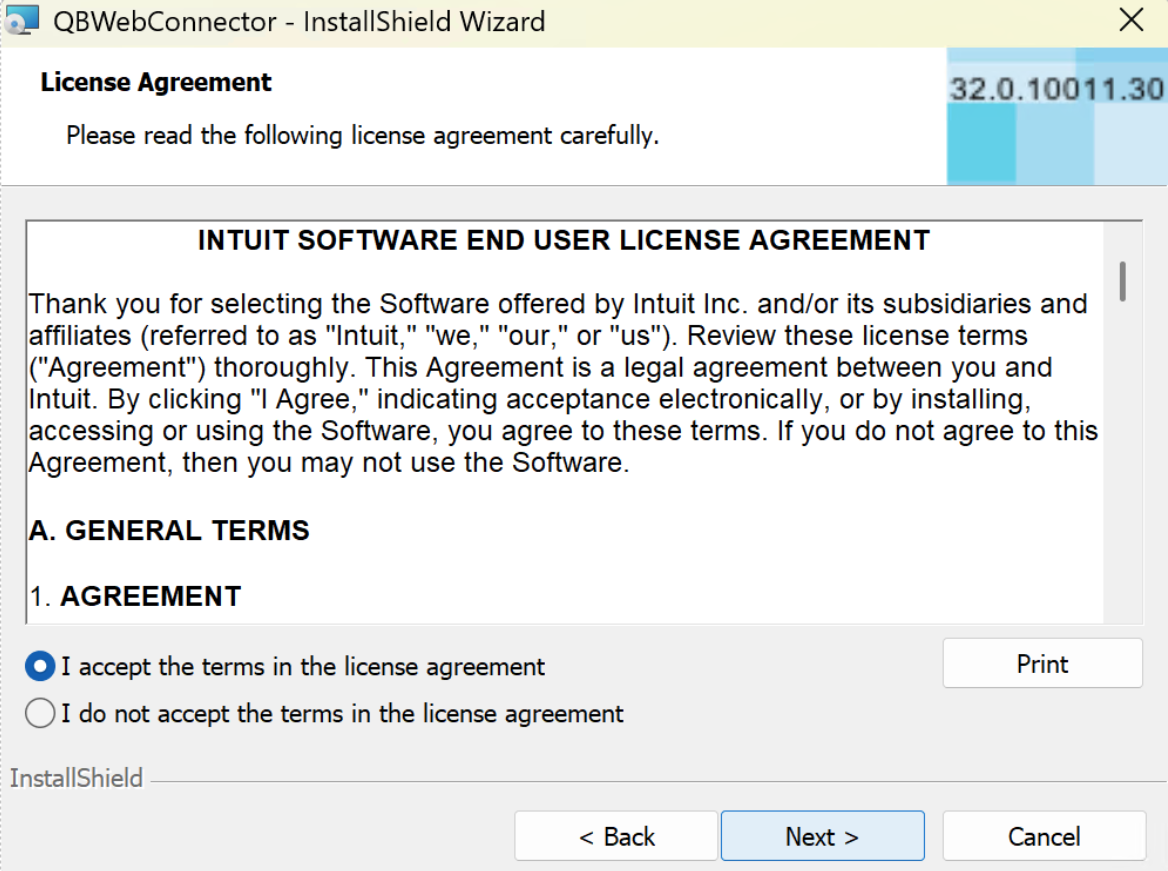
Step 4: Install Web Connector
This tool is officially released by QuickBooks to support local integration and order automation.
Installation Steps:
-
Unzip the downloaded package

-
Before installing Web Connector, you need to install QuickBooks, then close QuickBooks, otherwise you will get the following prompt:
-
Install dependency component: NDP451-KB2858728-x86-x64-AllOS-ENU(.exe)
-
Install Web Connector: QBWebConnectorInstaller(.exe)
 After installation, if no shortcut appears, search “Web Connector” in the Start menu
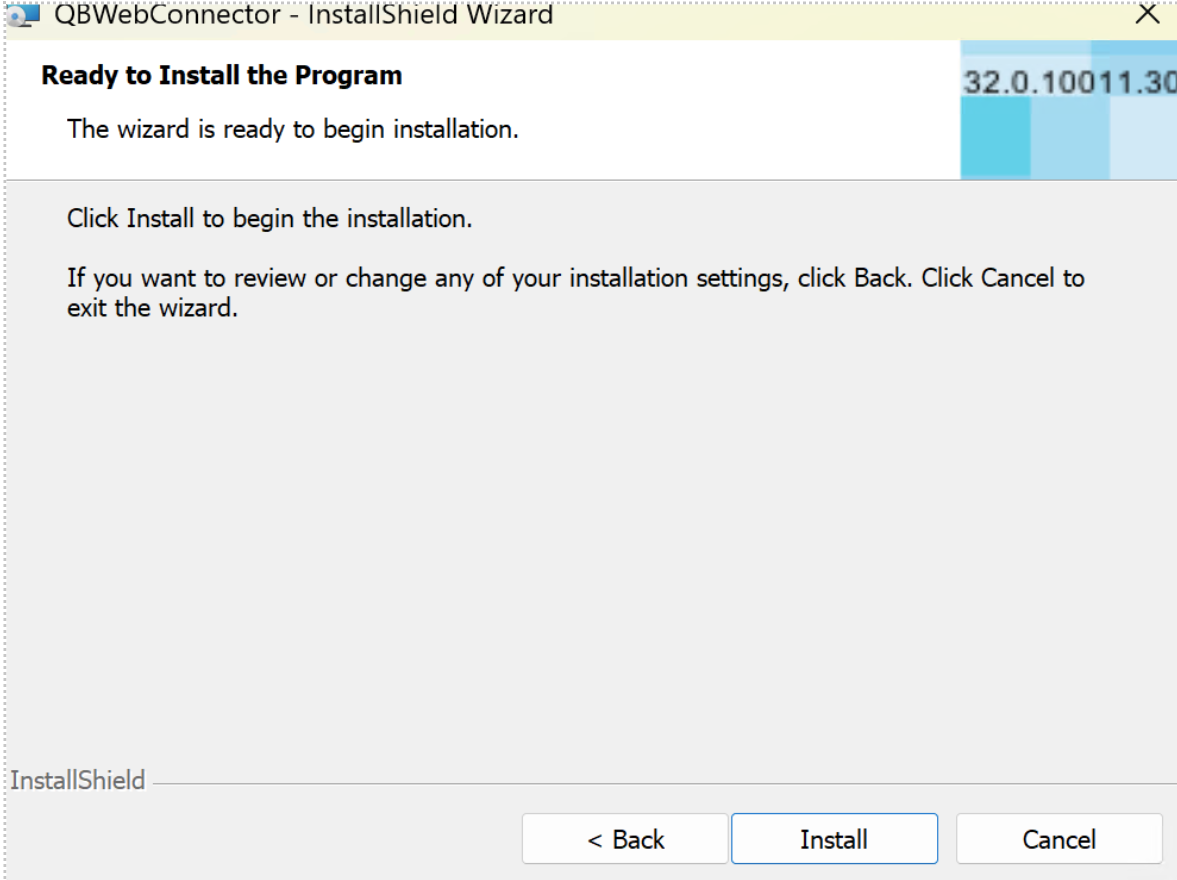
Step 5: Connect Web Connector to System
After successfully installing Web Connector, you need to open the QuickBooks software to continue connecting SO with Web Connector
-
Open QuickBooks software
-
Open Web Connector
-
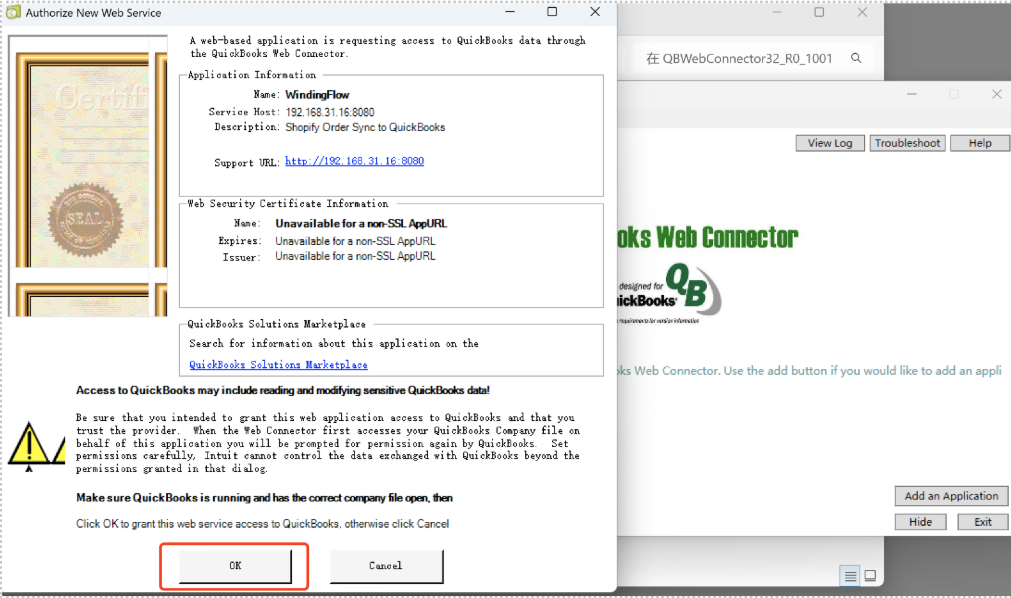
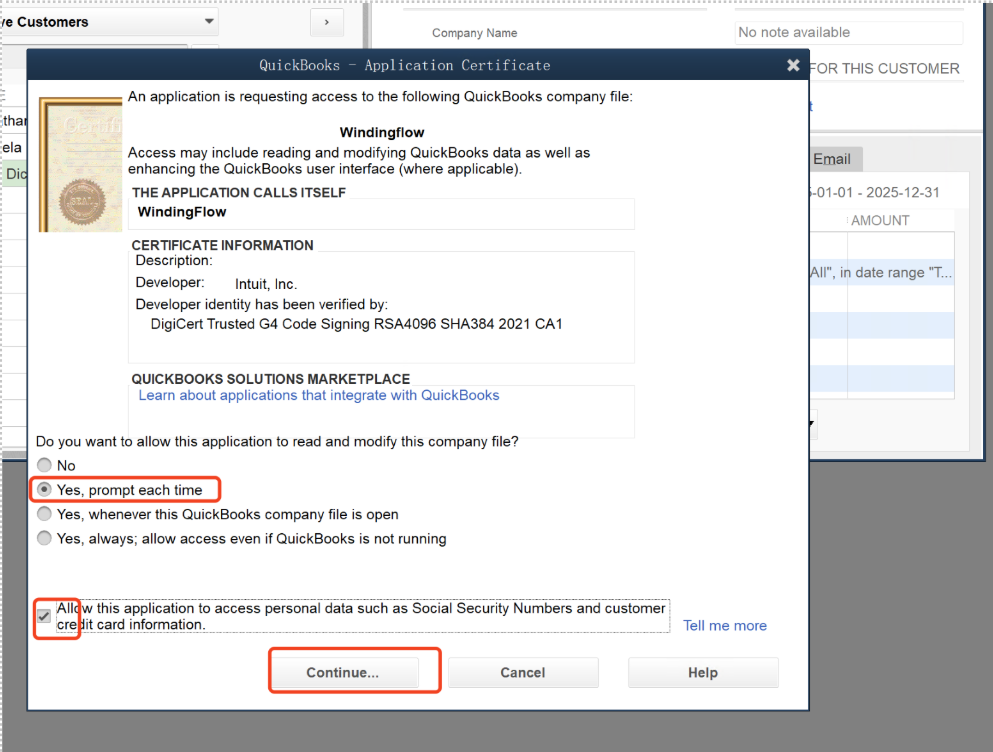
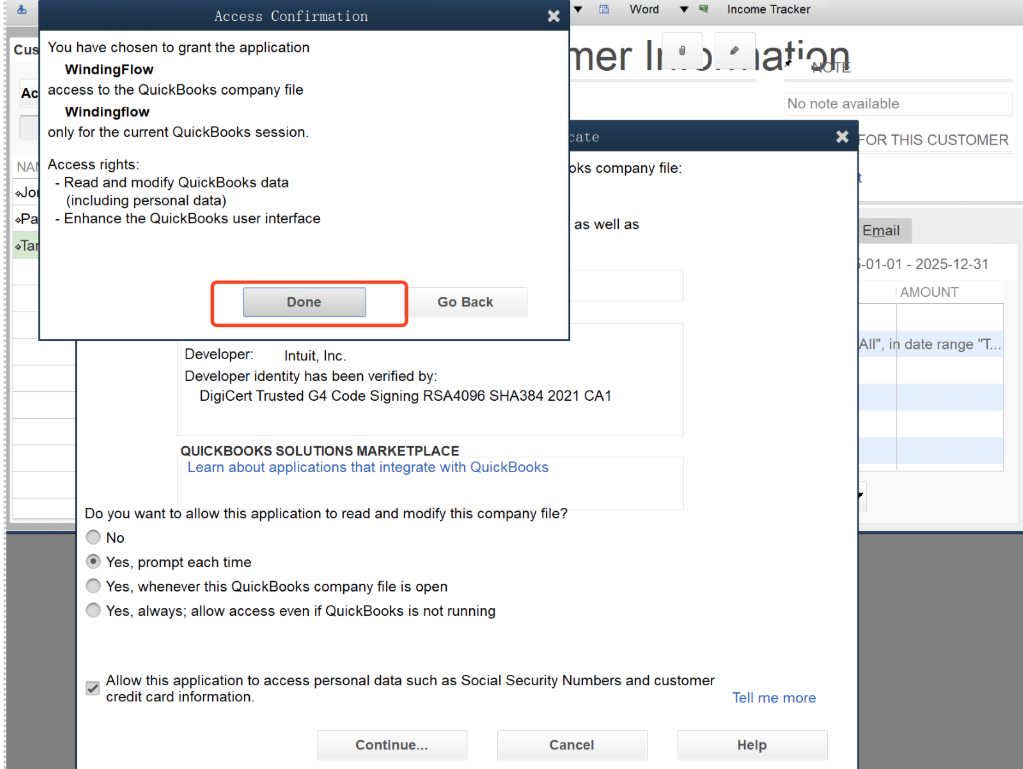
Click “Add Application” to import the
.qwcfile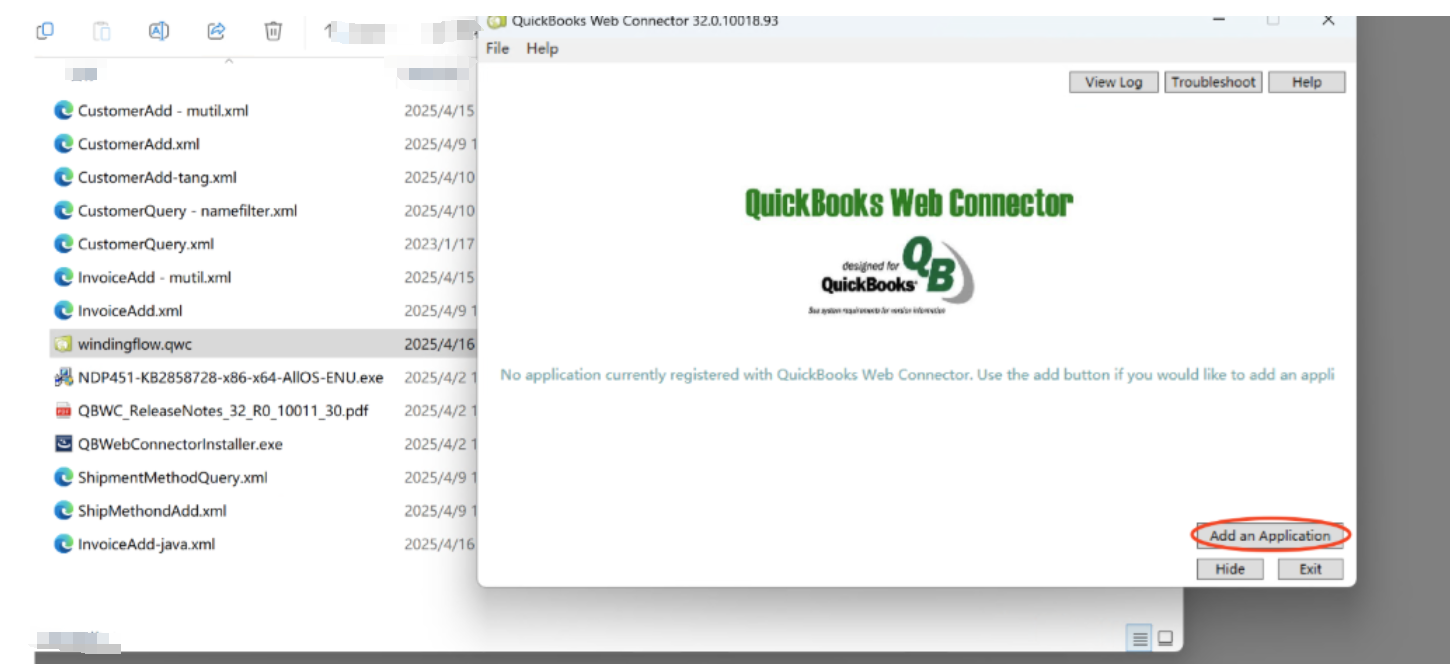
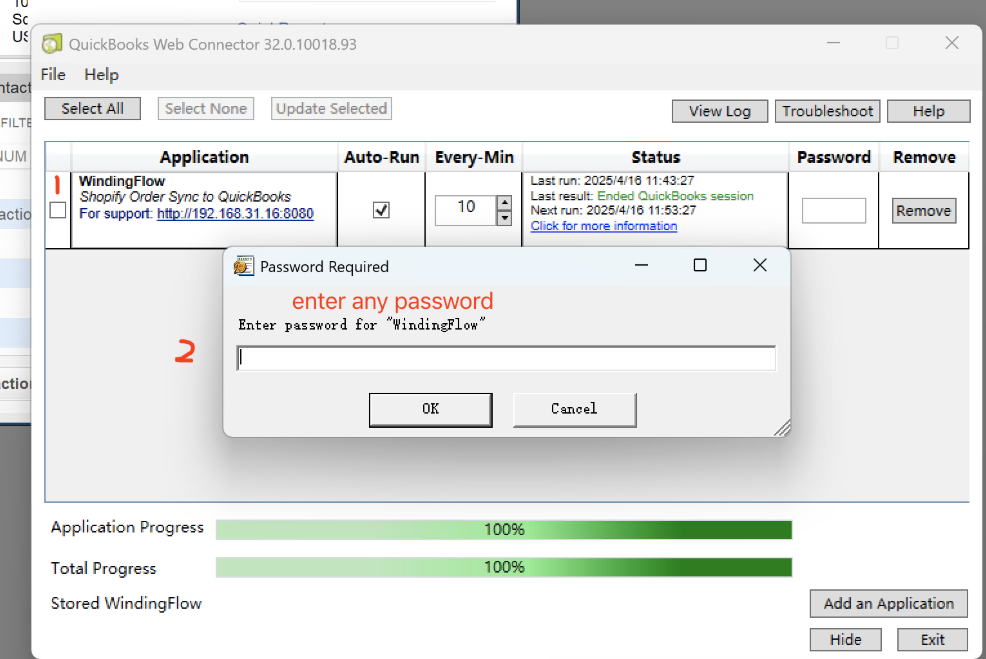
-
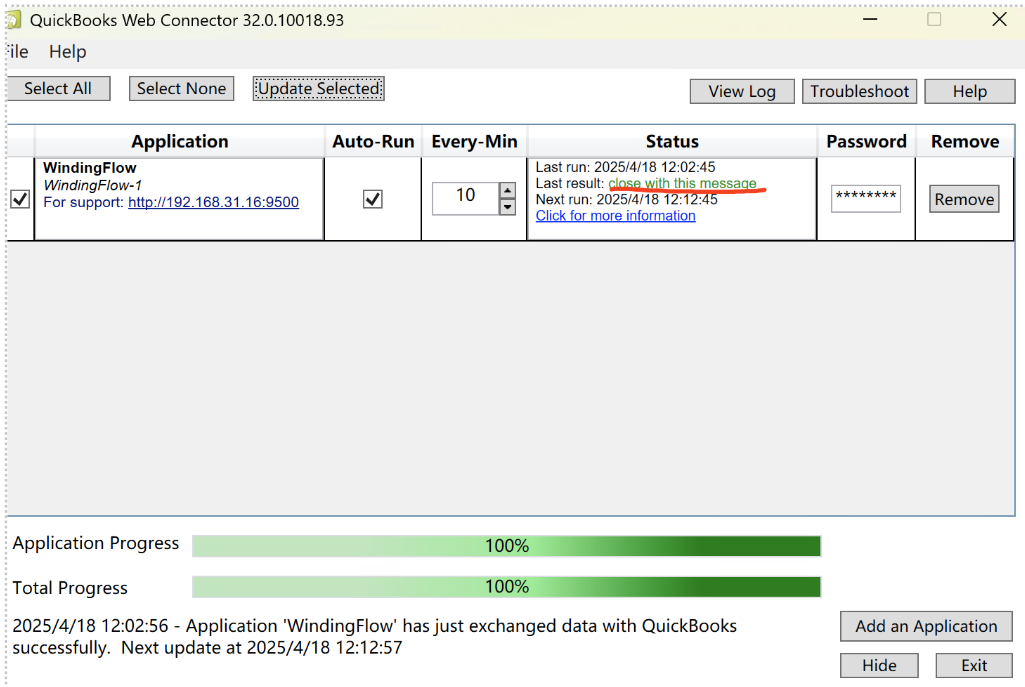
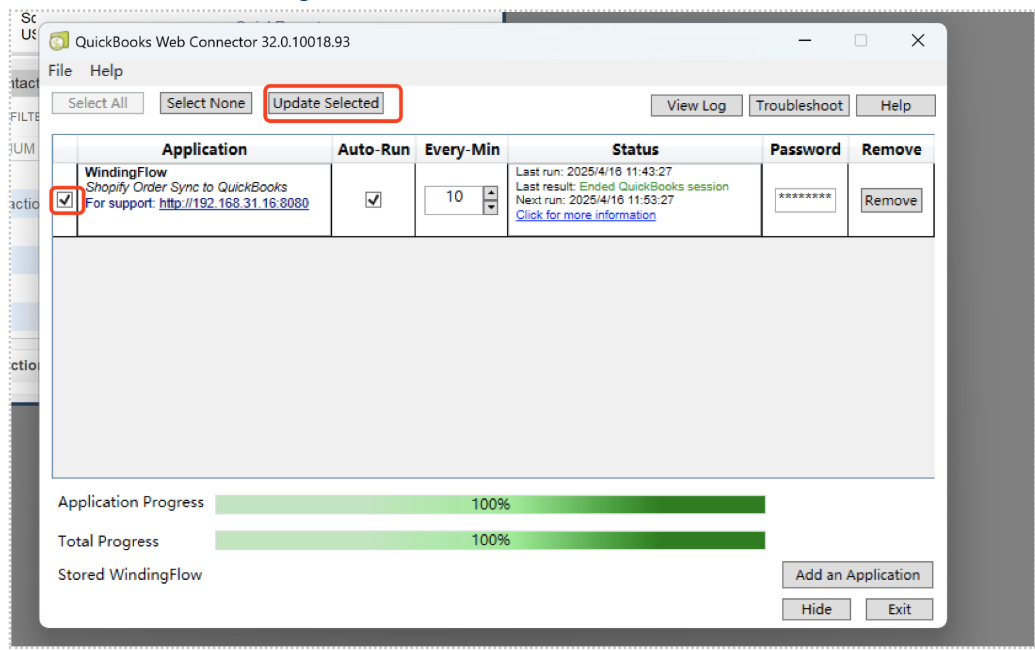
Check the box and click “Update Selected” to test the connection
QuickBooks must be open before connecting
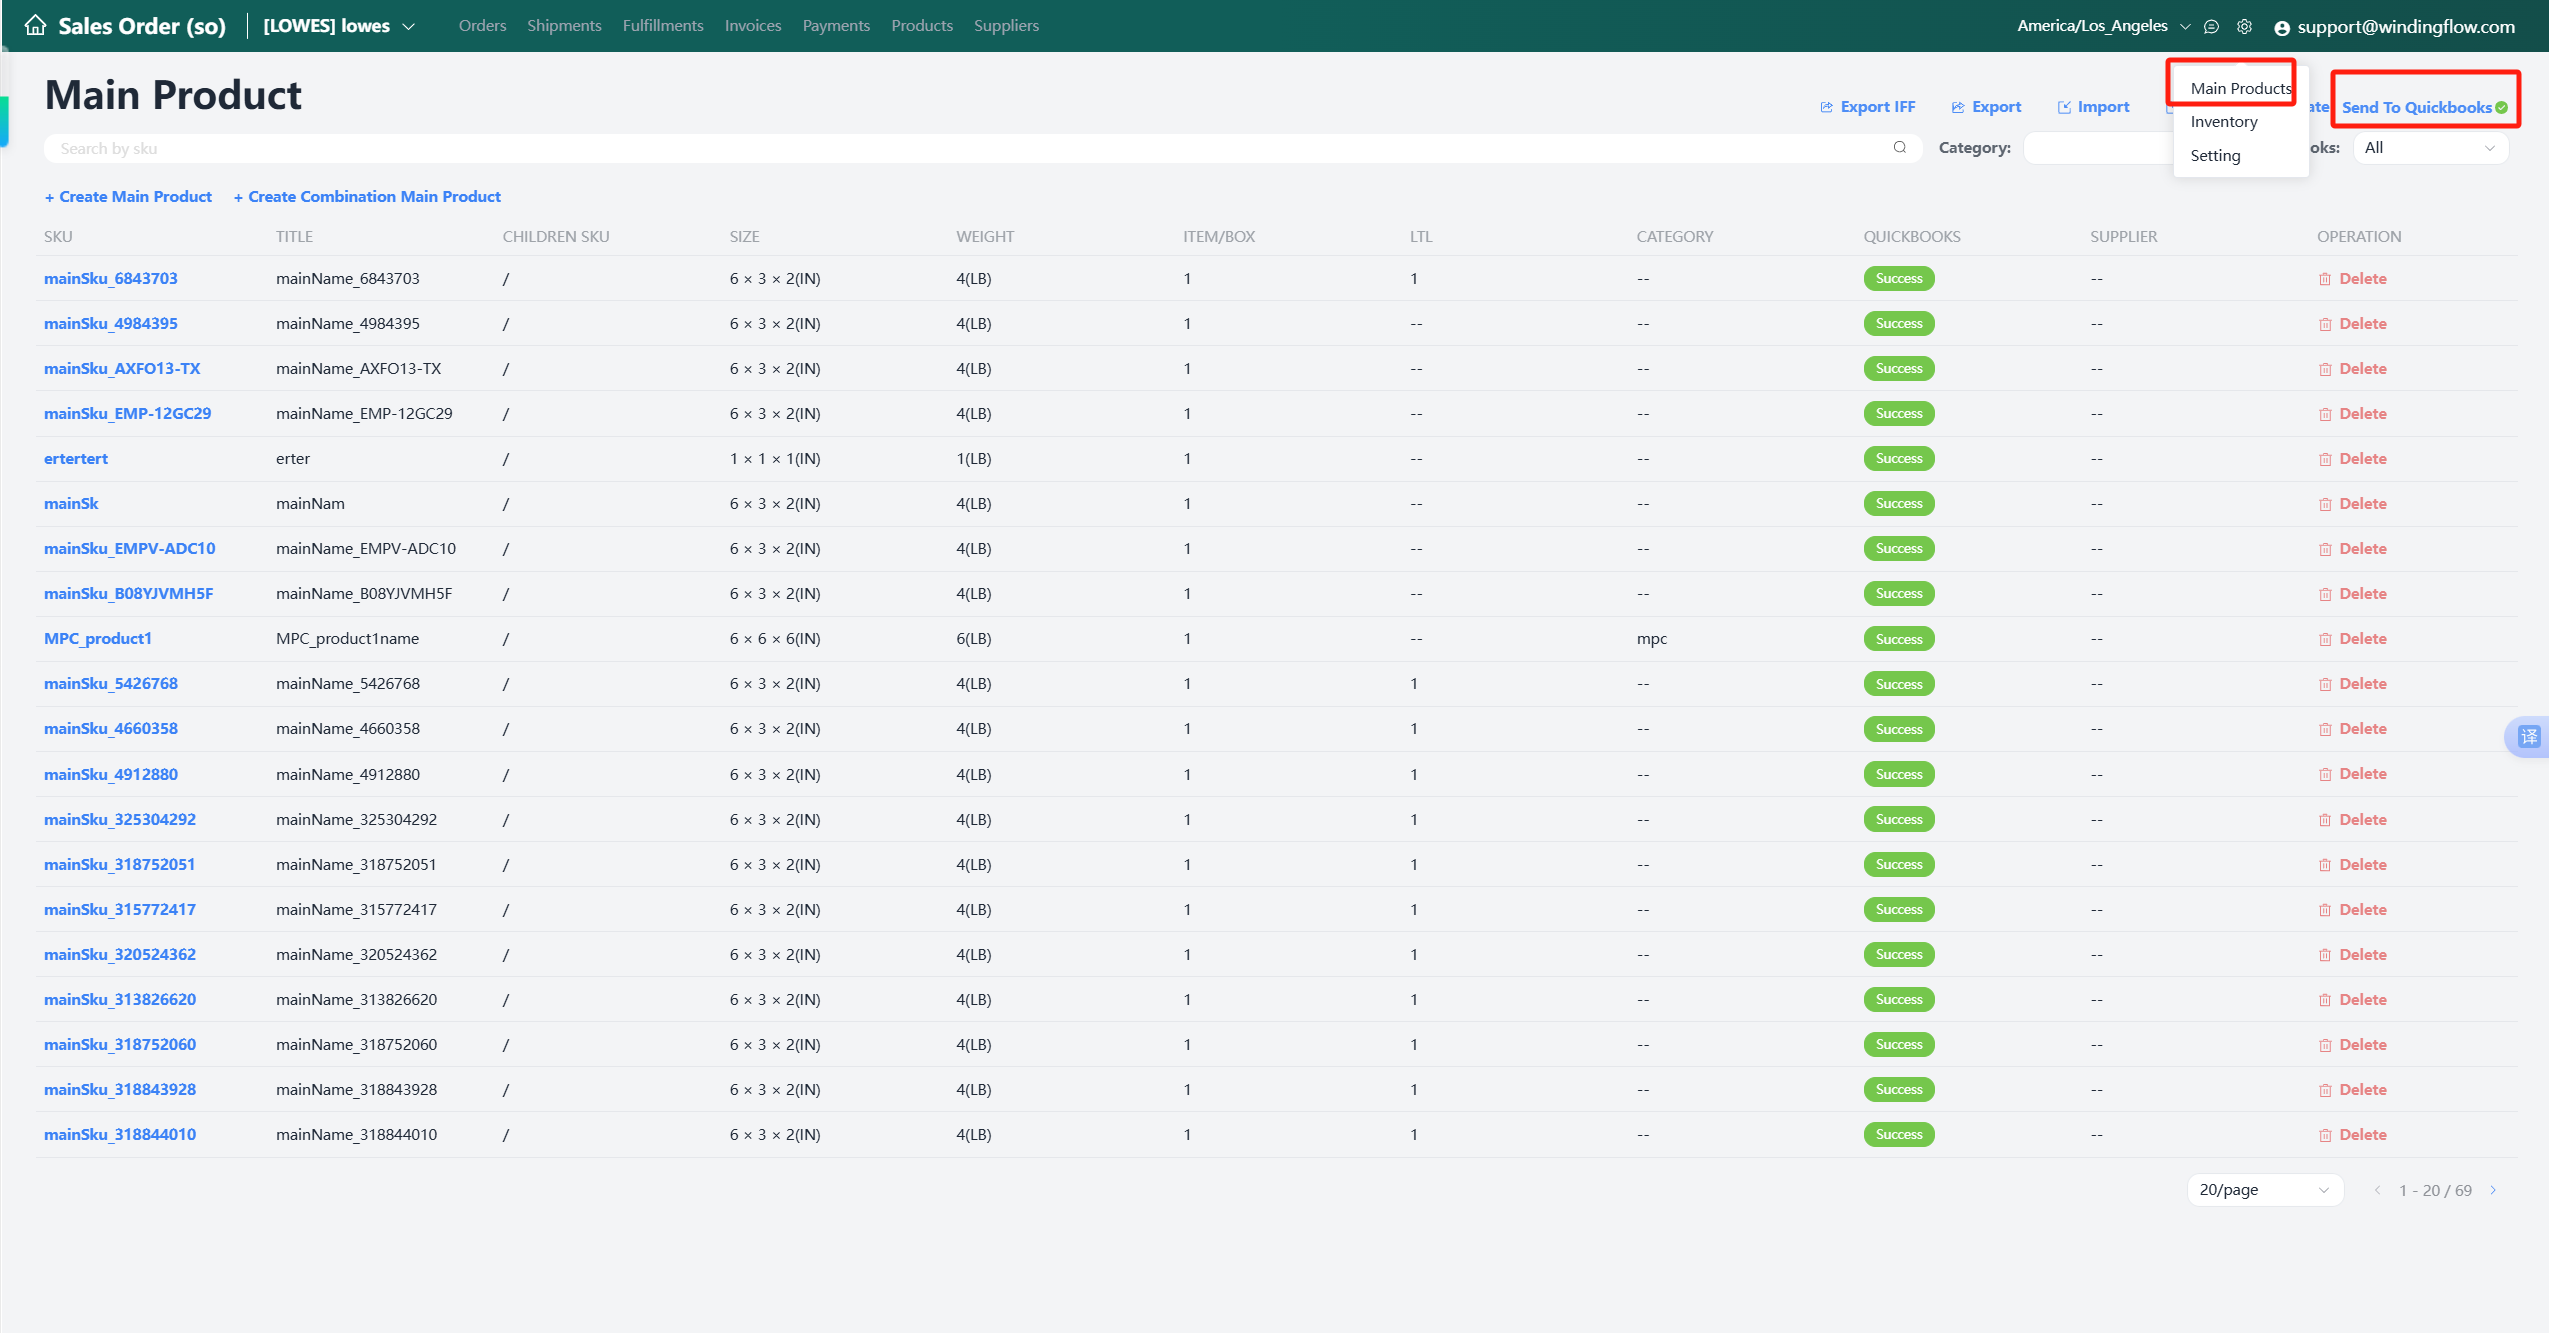
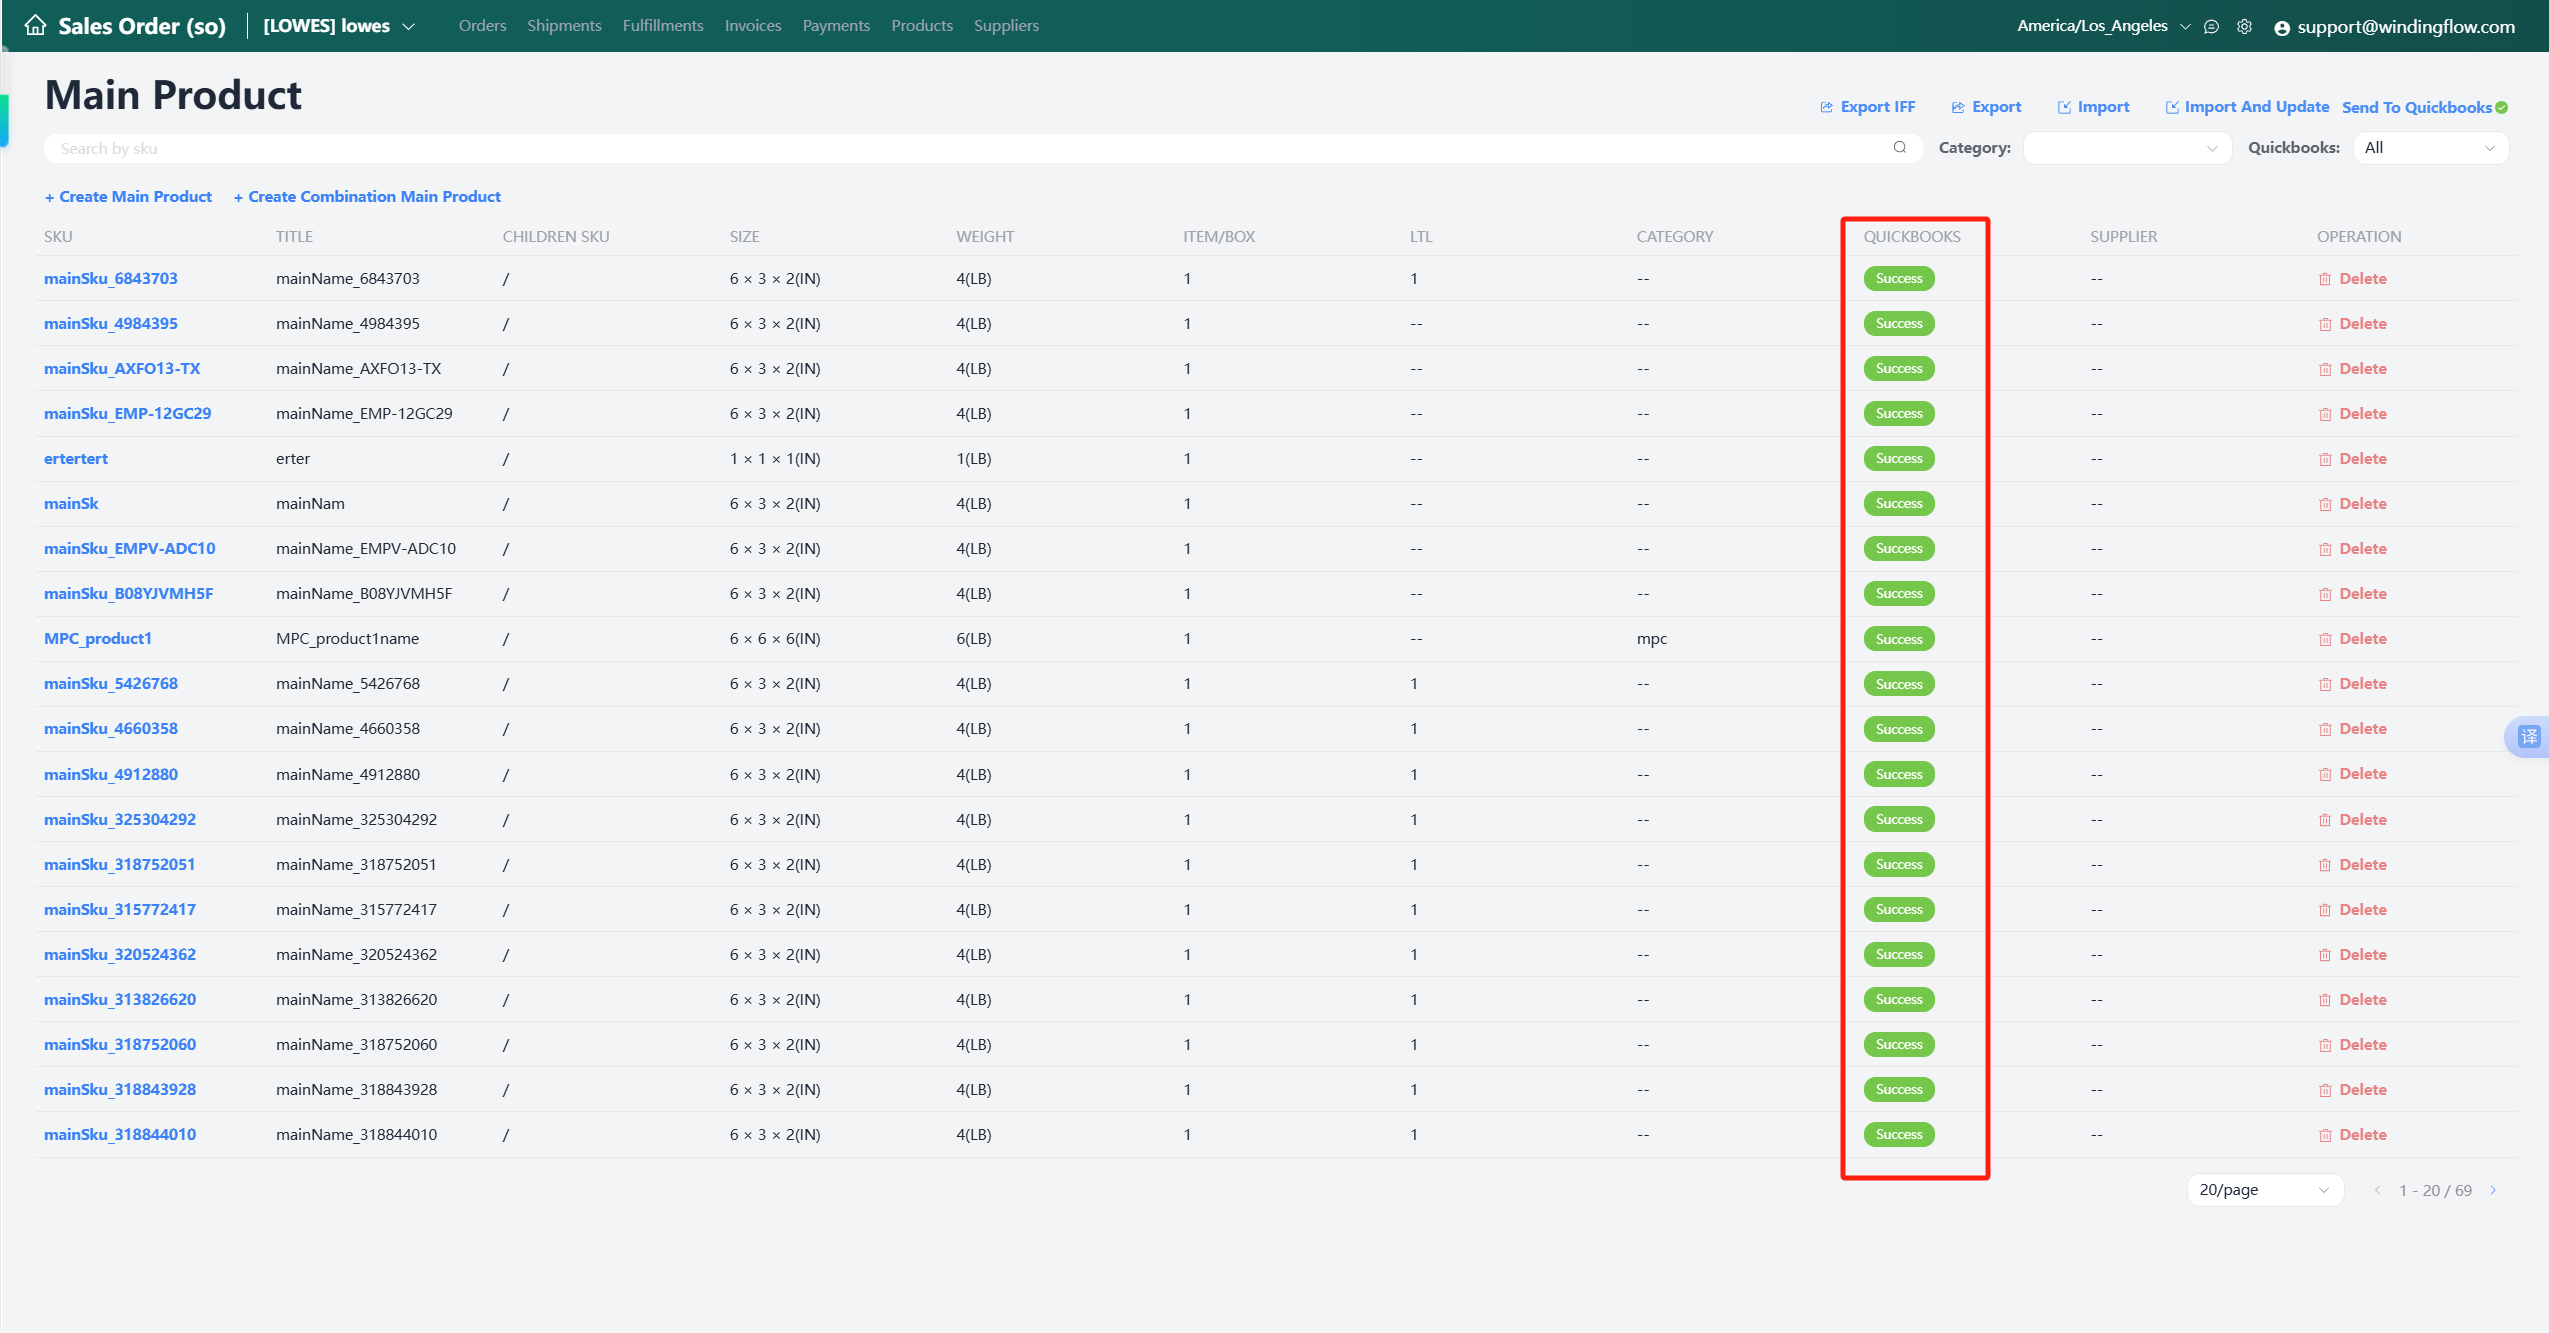
Step 6: Sync Product Data
Associate the instance with QuickBooks Desktop
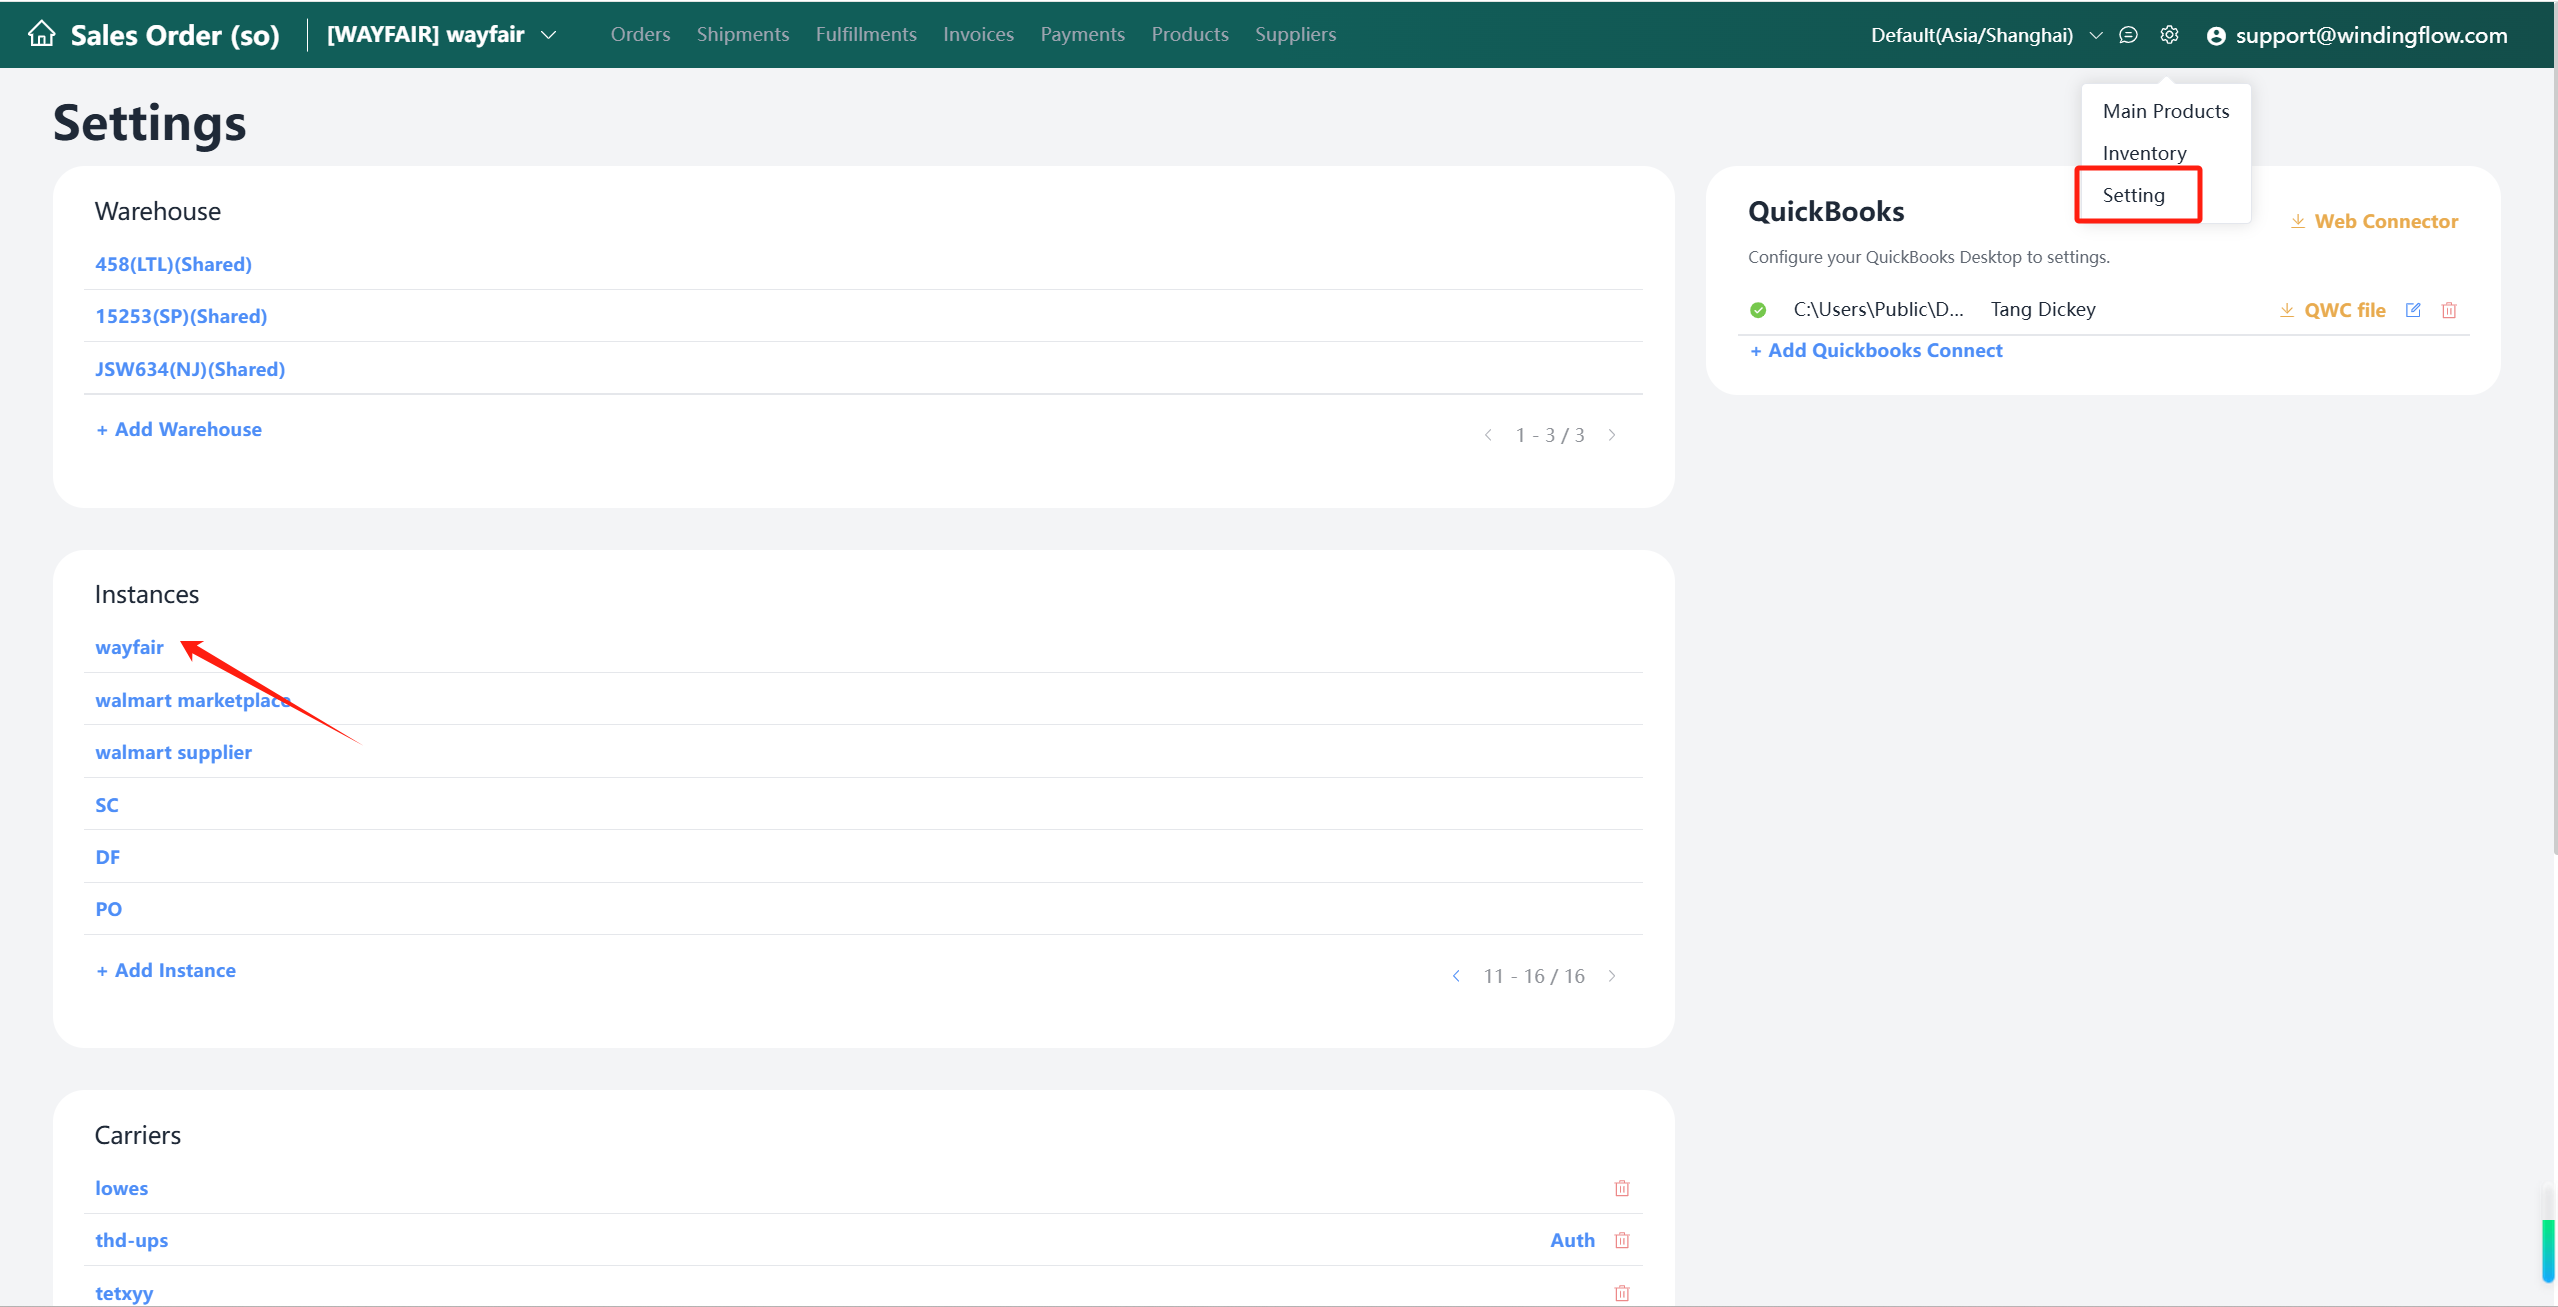
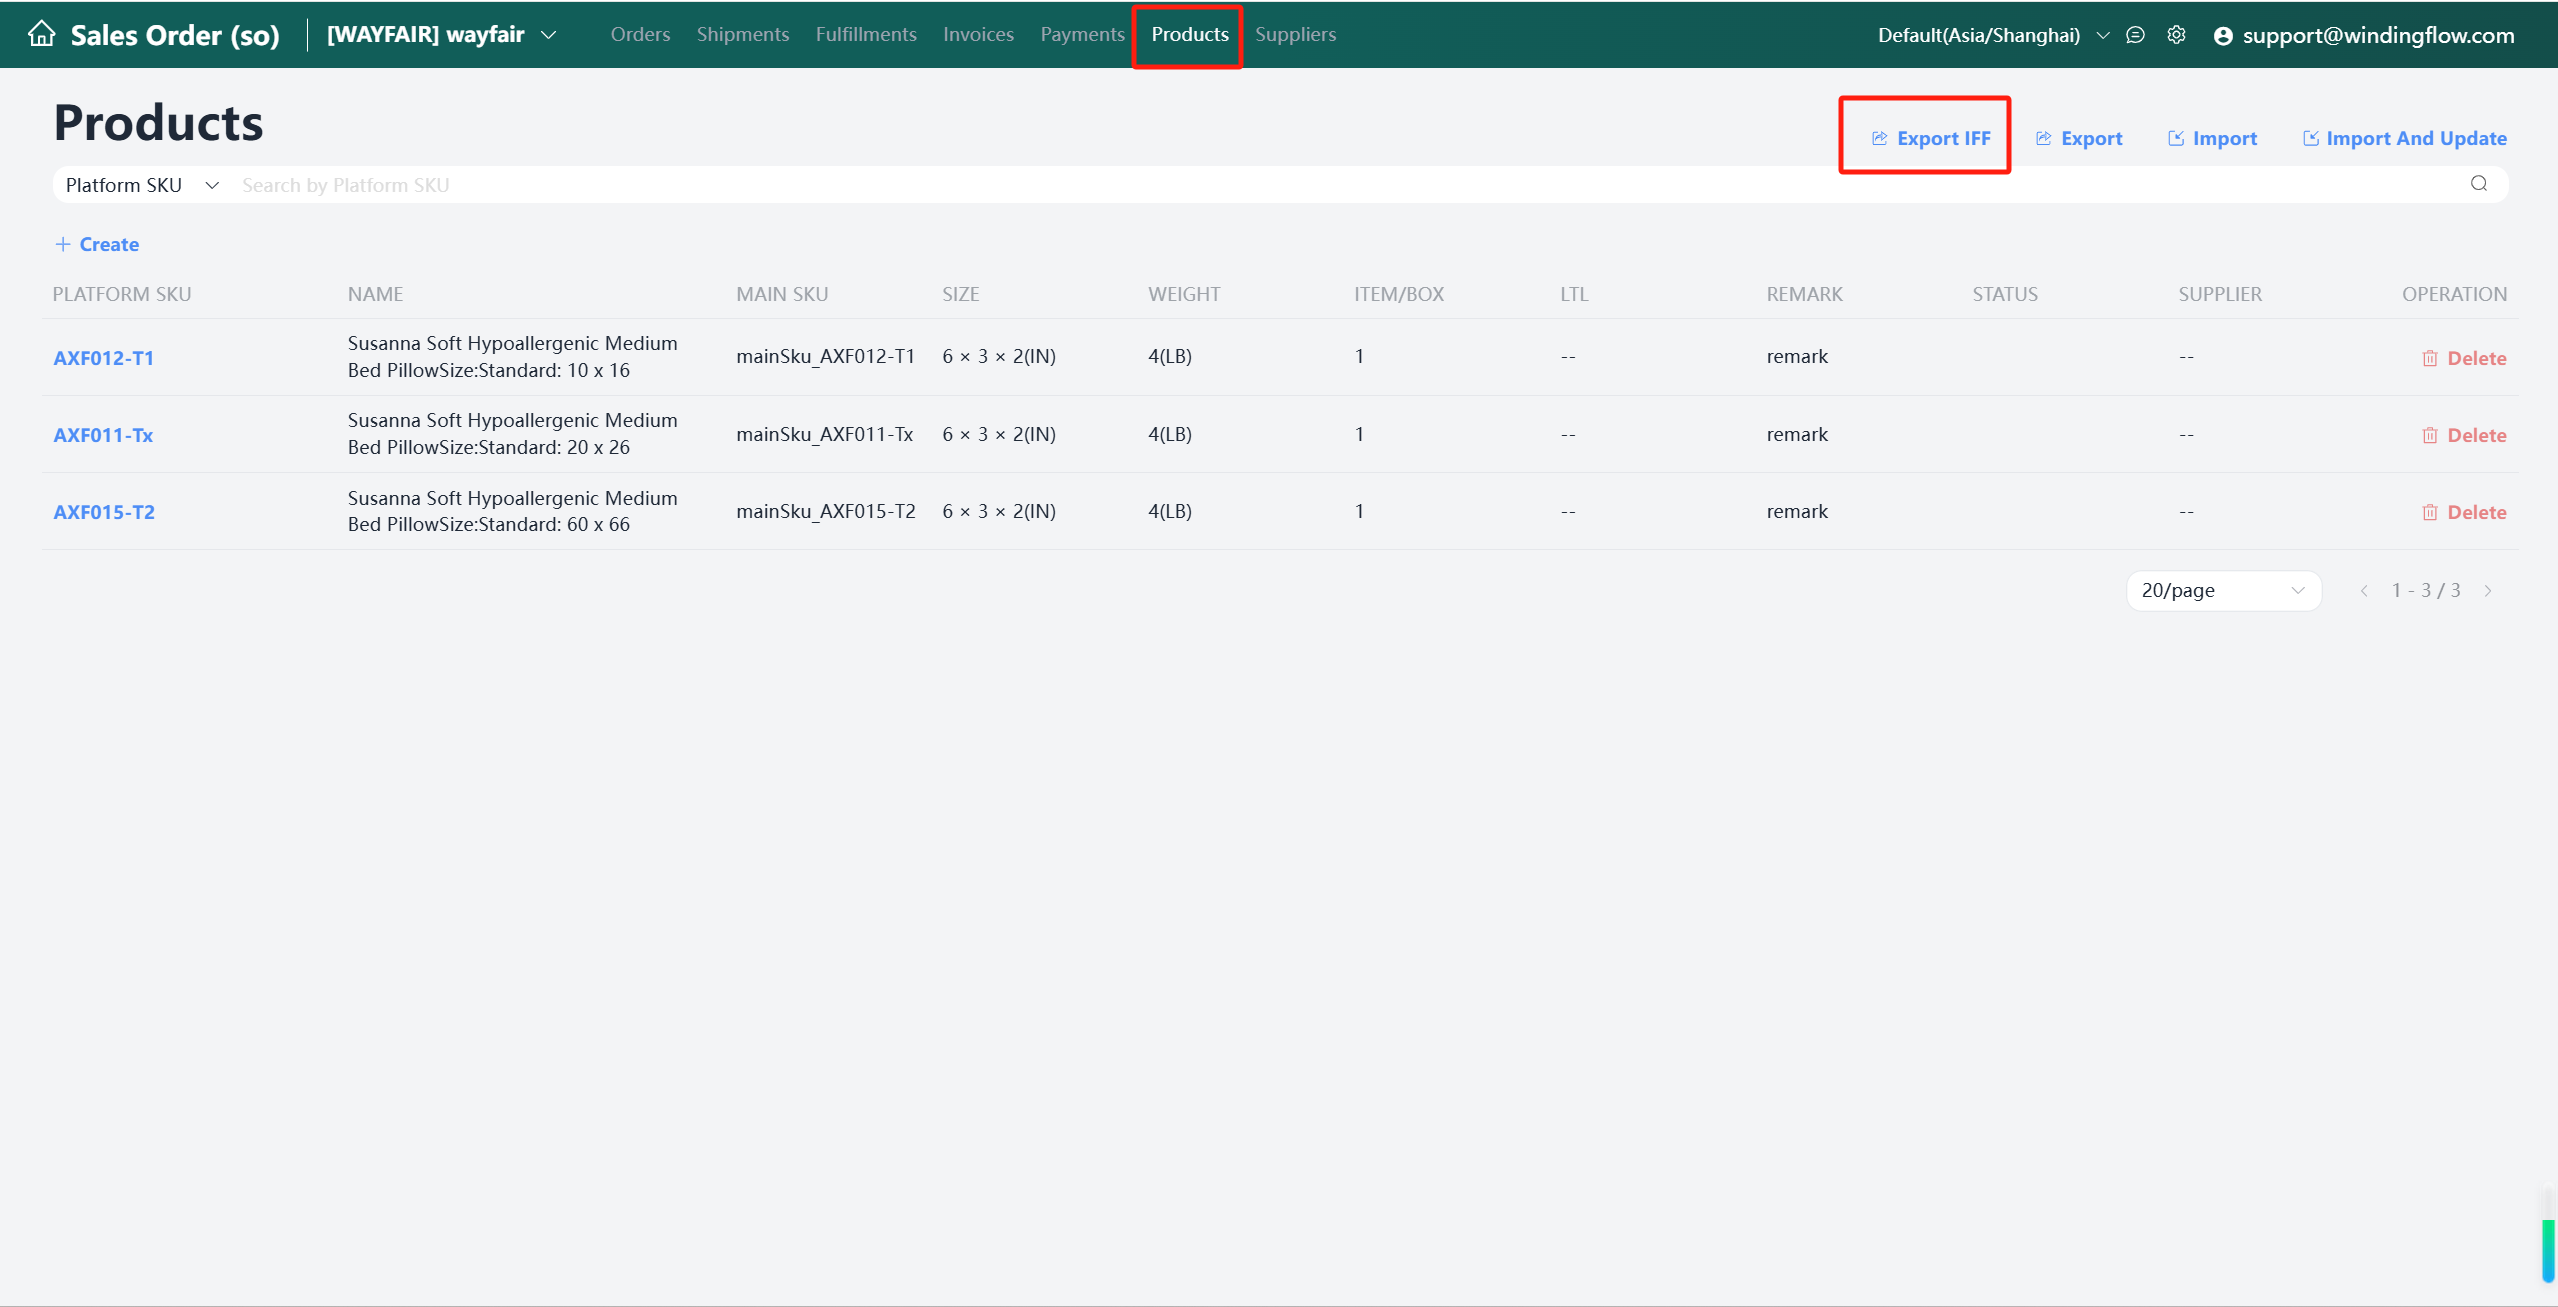
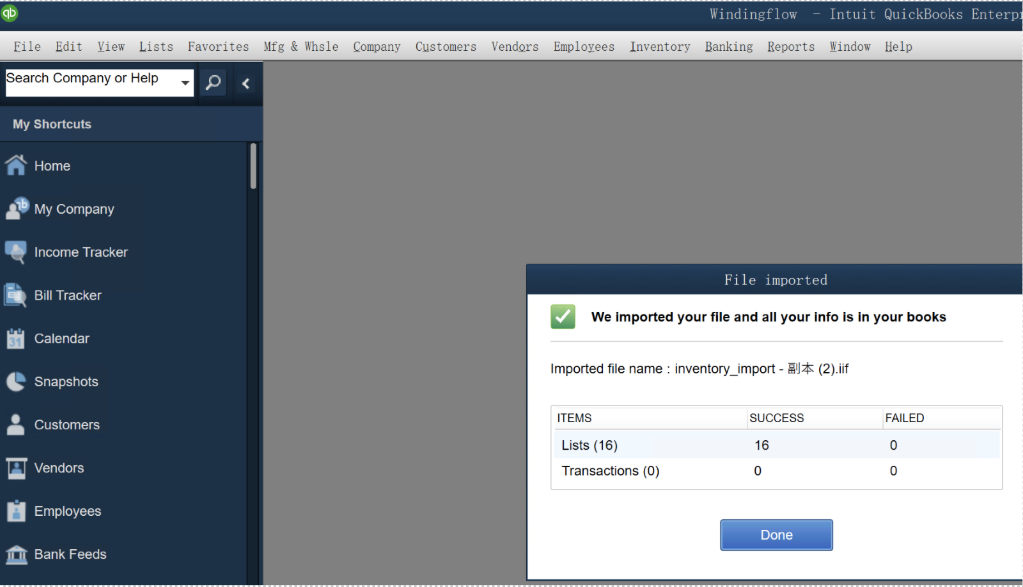
Navigate to the Main Product module in the order system. Click on the "Main Product" menu to enter the main product list. Click the "Send To QuickBooks" button to initiate the product synchronization process. Wait for the product status to update to "success". Once this occurs, the products have been successfully synchronized to QuickBooks.
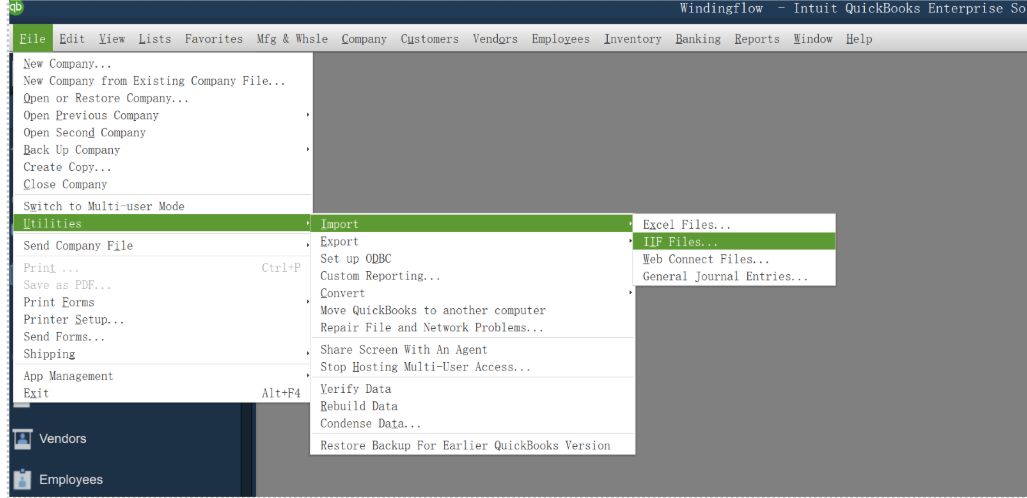
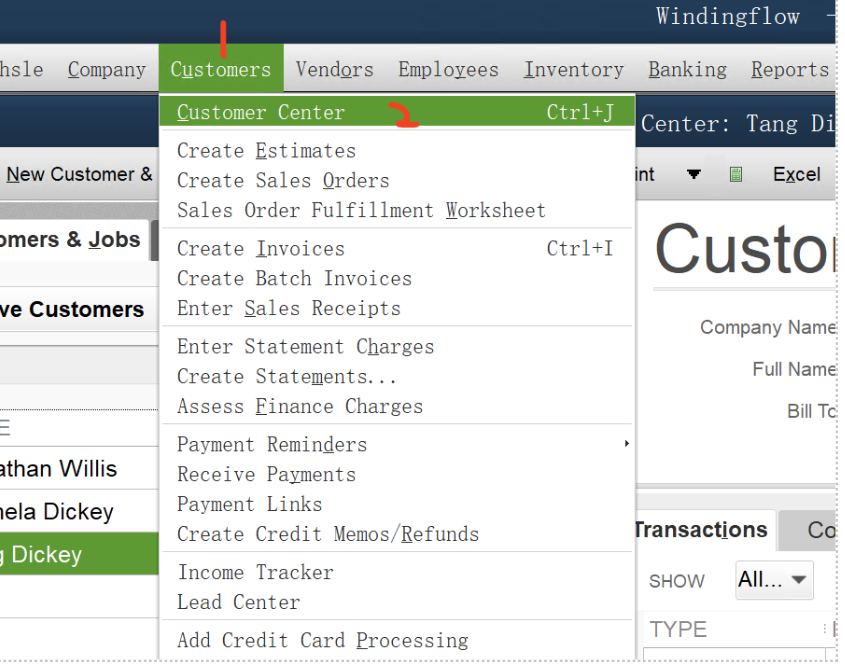
Export IFF file and import it into QuickBooks for product synchronization

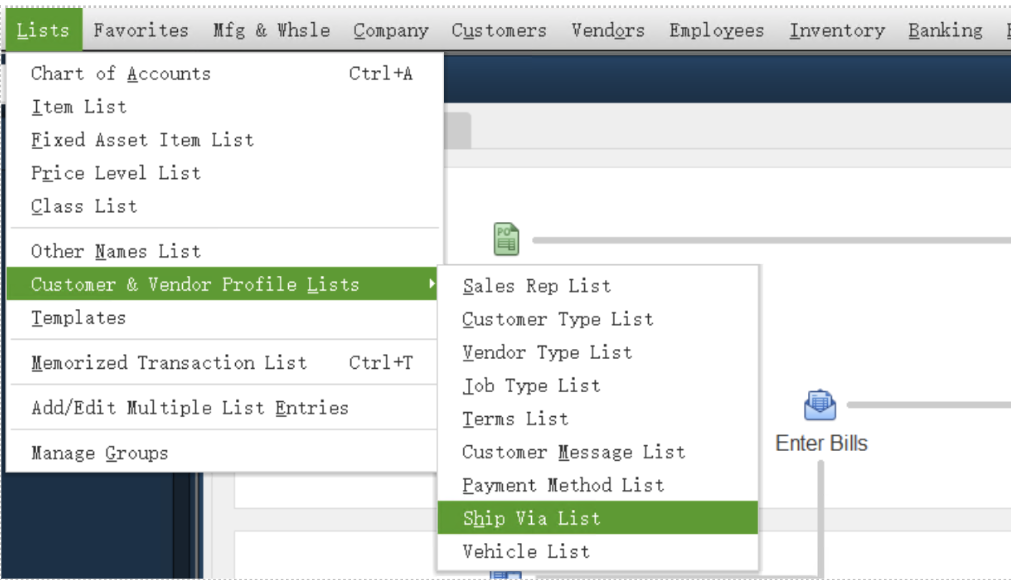
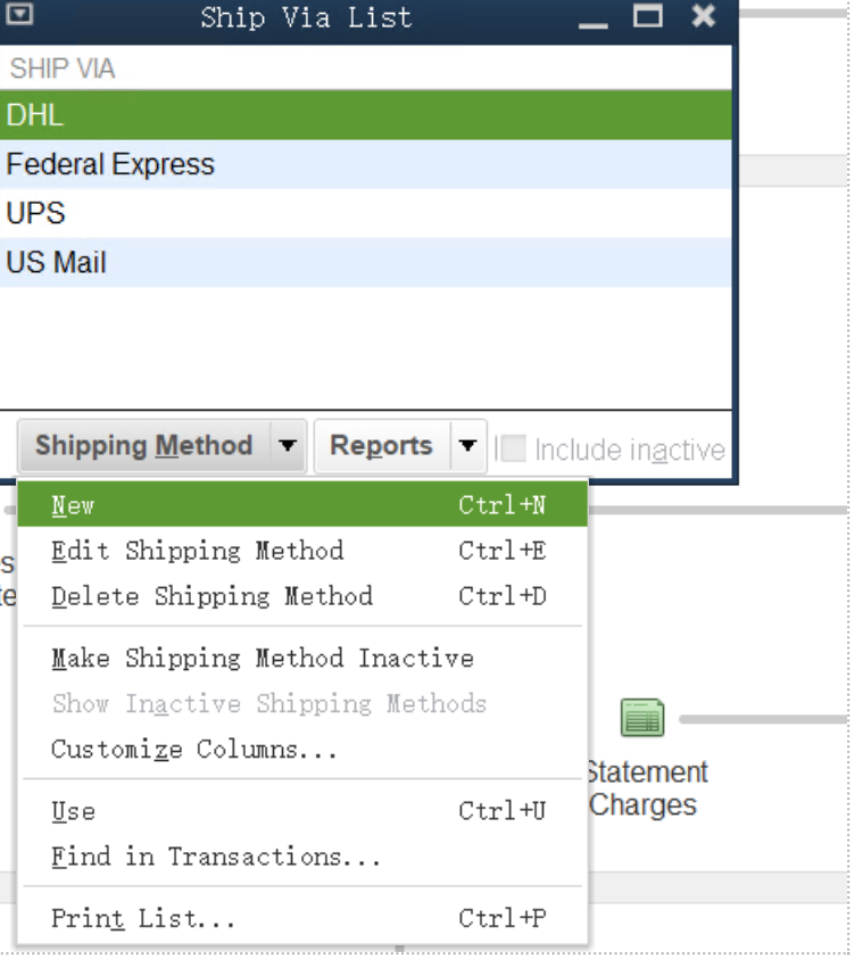
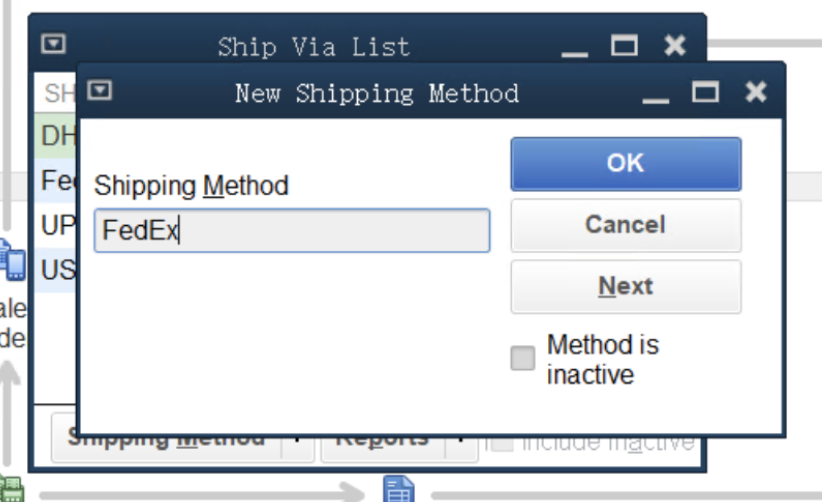
If the shipping method does not exist, add it manually
Step 7: Send Invoice Data
Automatic Sending:
- In the fulfillment interface, click “Create Invoice”
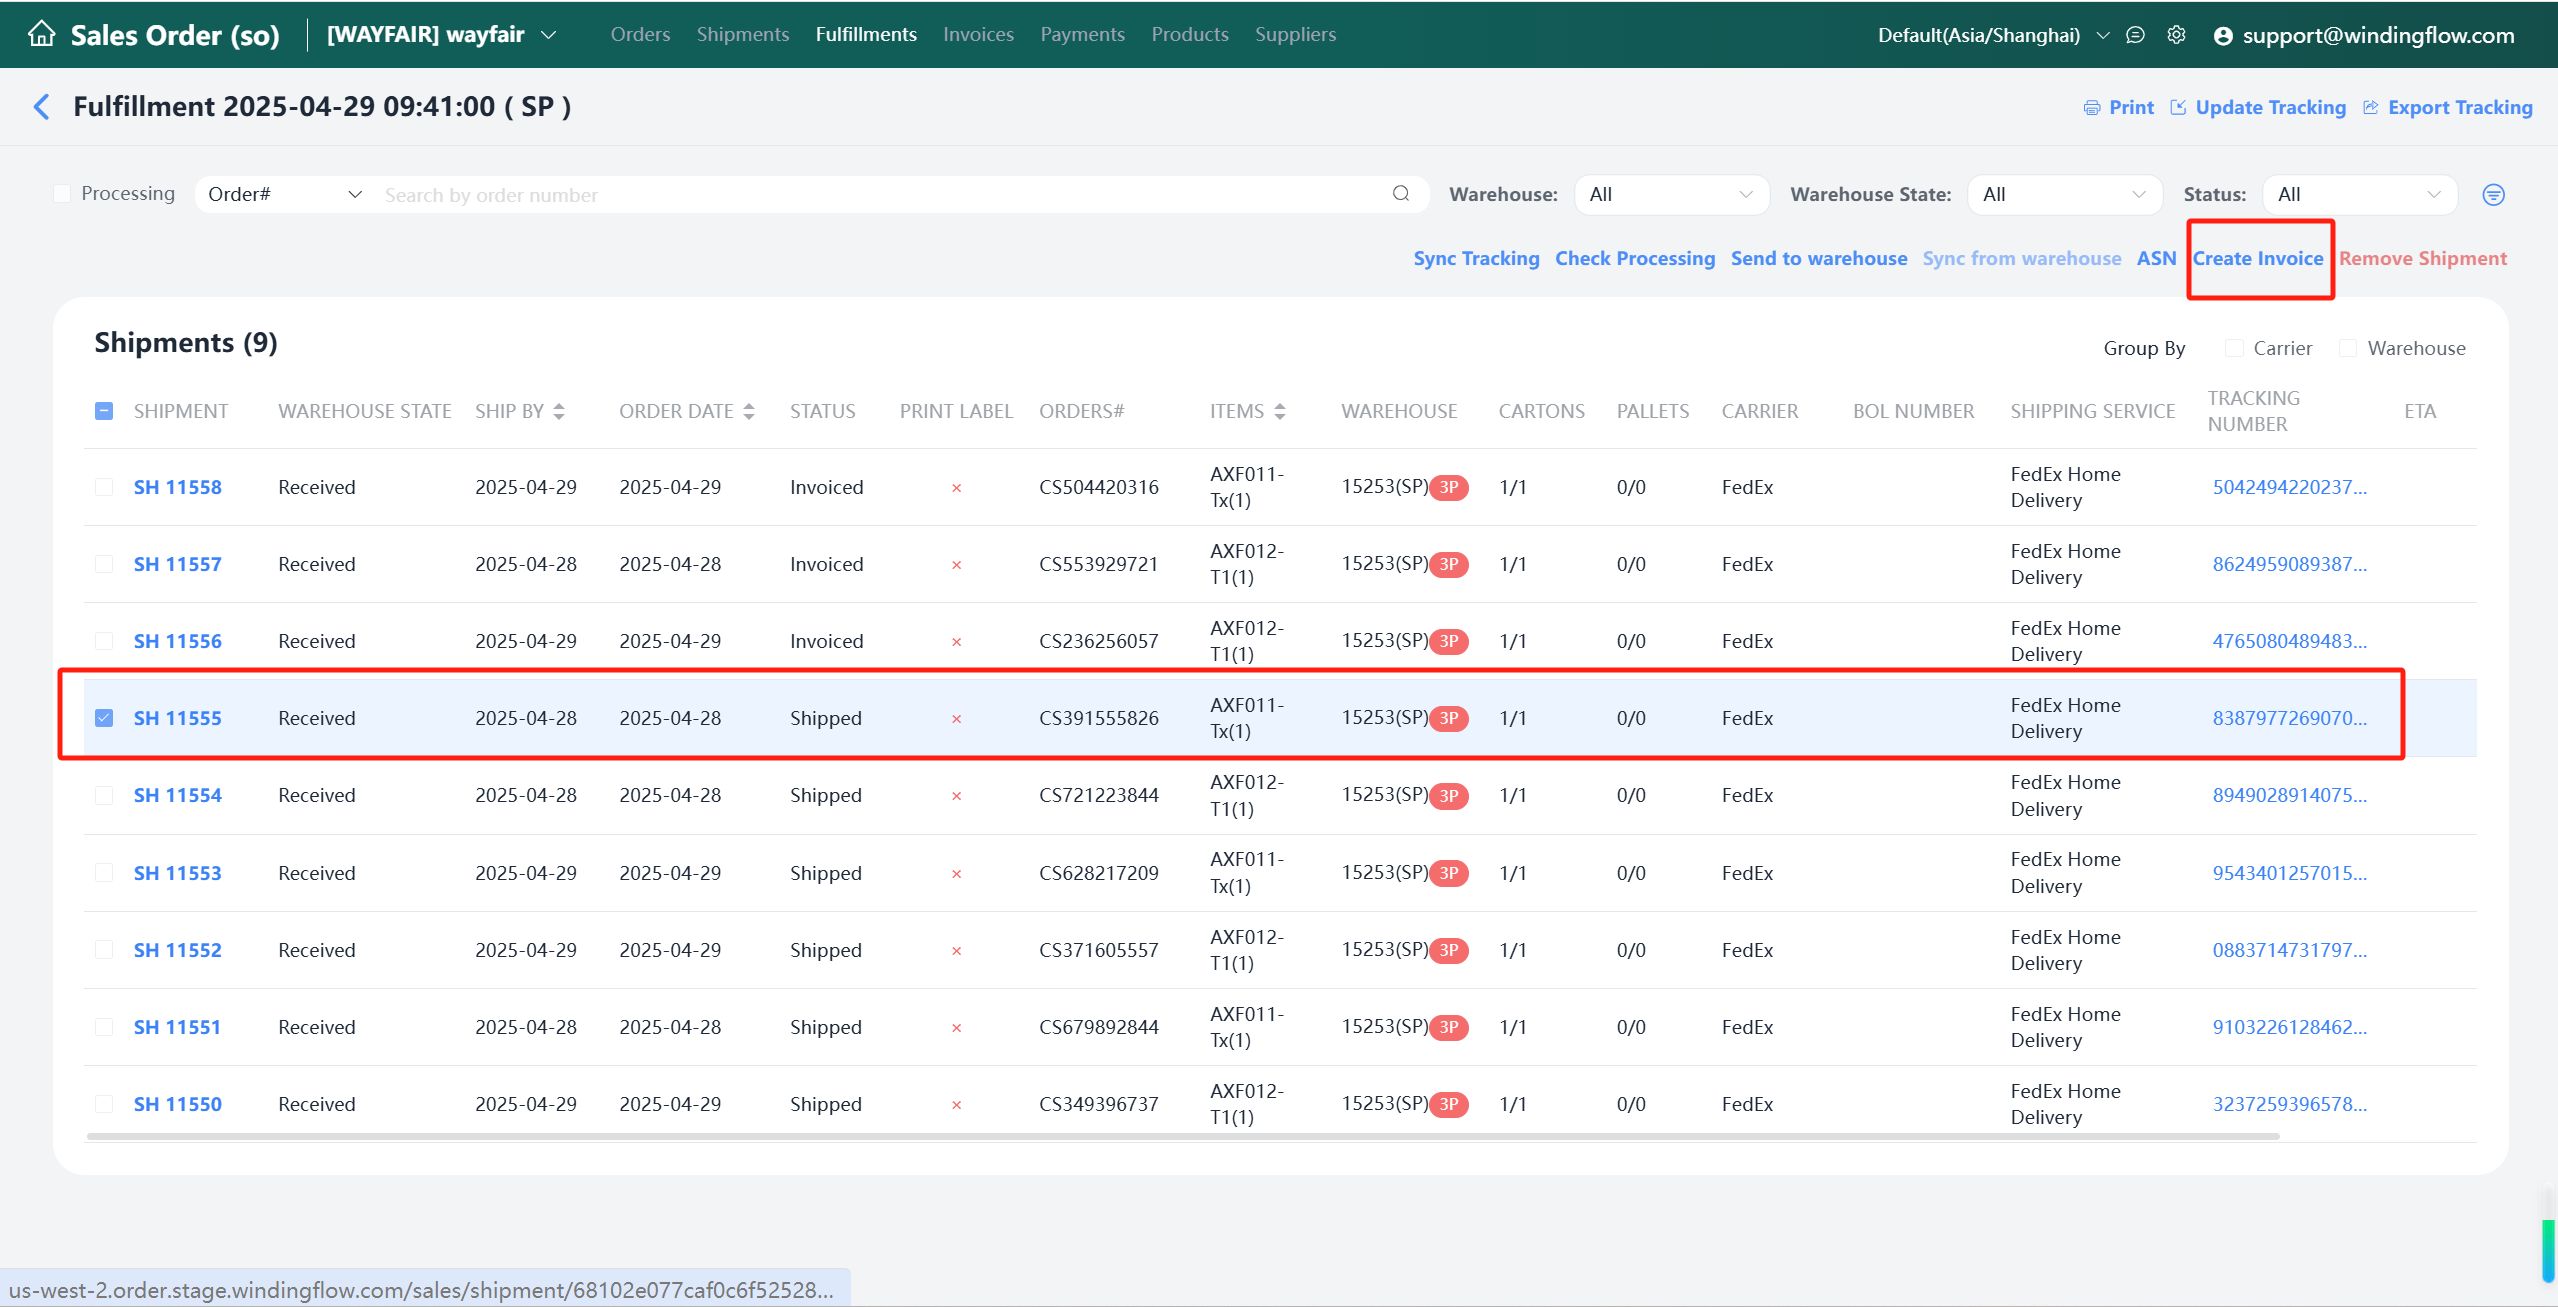
- The system pushes invoice data to the queue; Web Connector syncs periodically
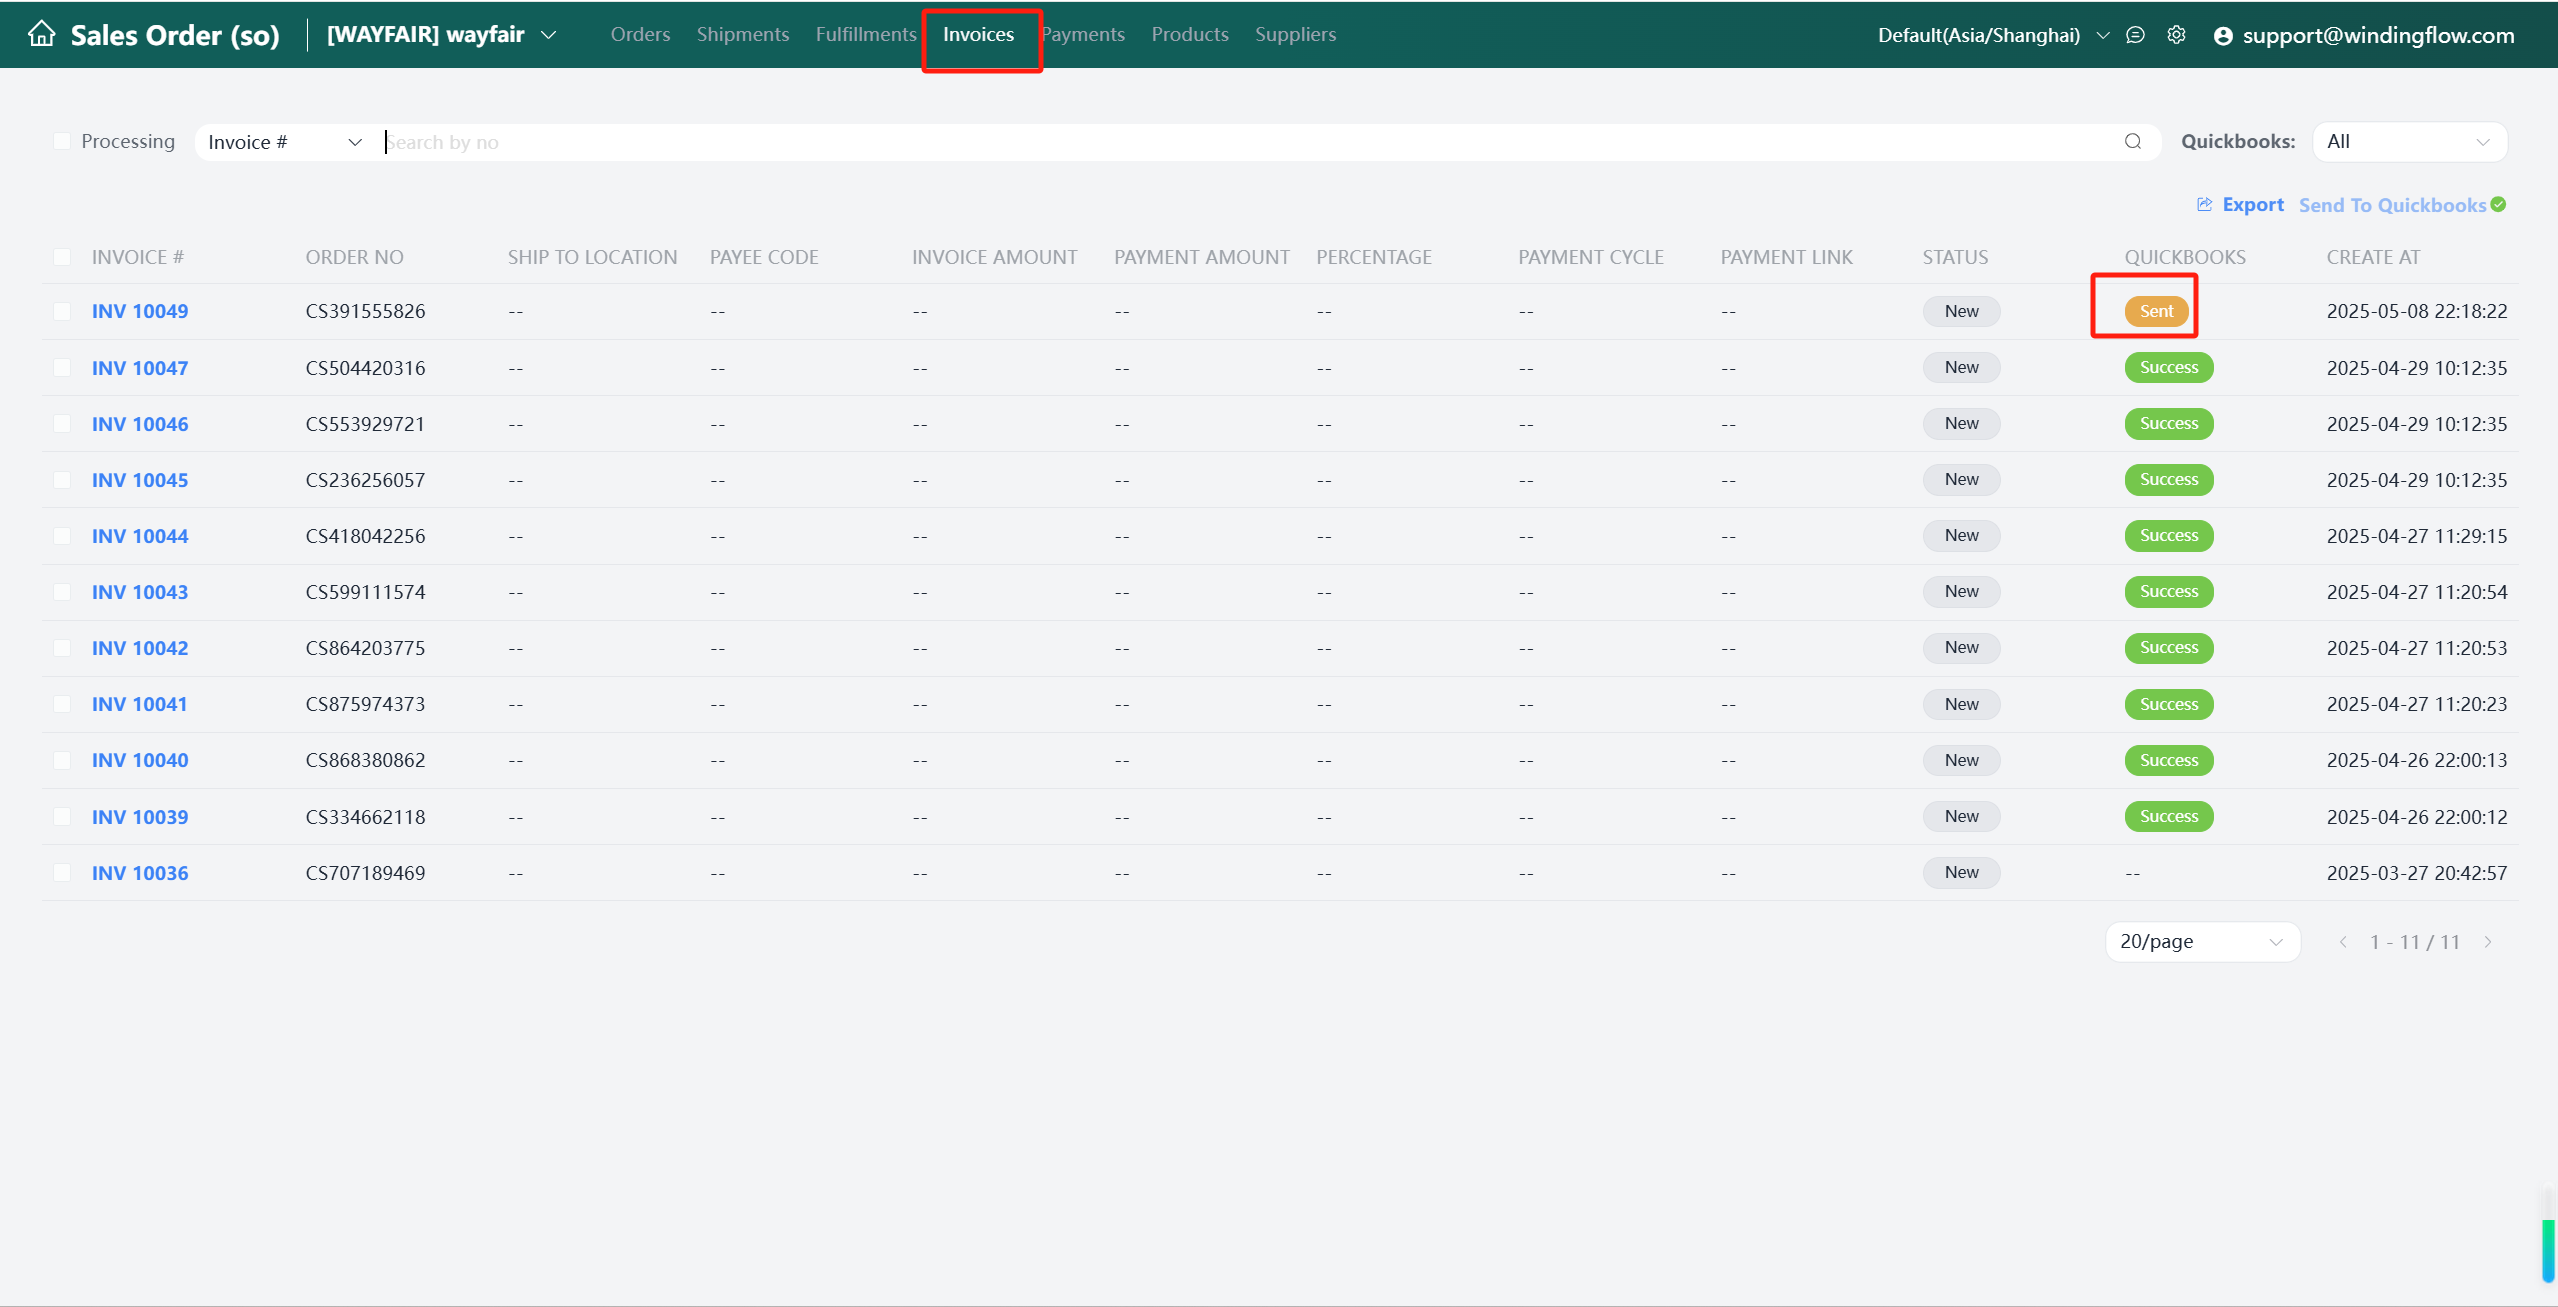
- View status in the Invoice module
Manual Sending (for exception handling):
If you encounter unexpected situations and sending fails, in the Invoice interface, you can check the Invoice and then click Send To QuickBooks. Currently, it will only process Invoices that are not in Success status.
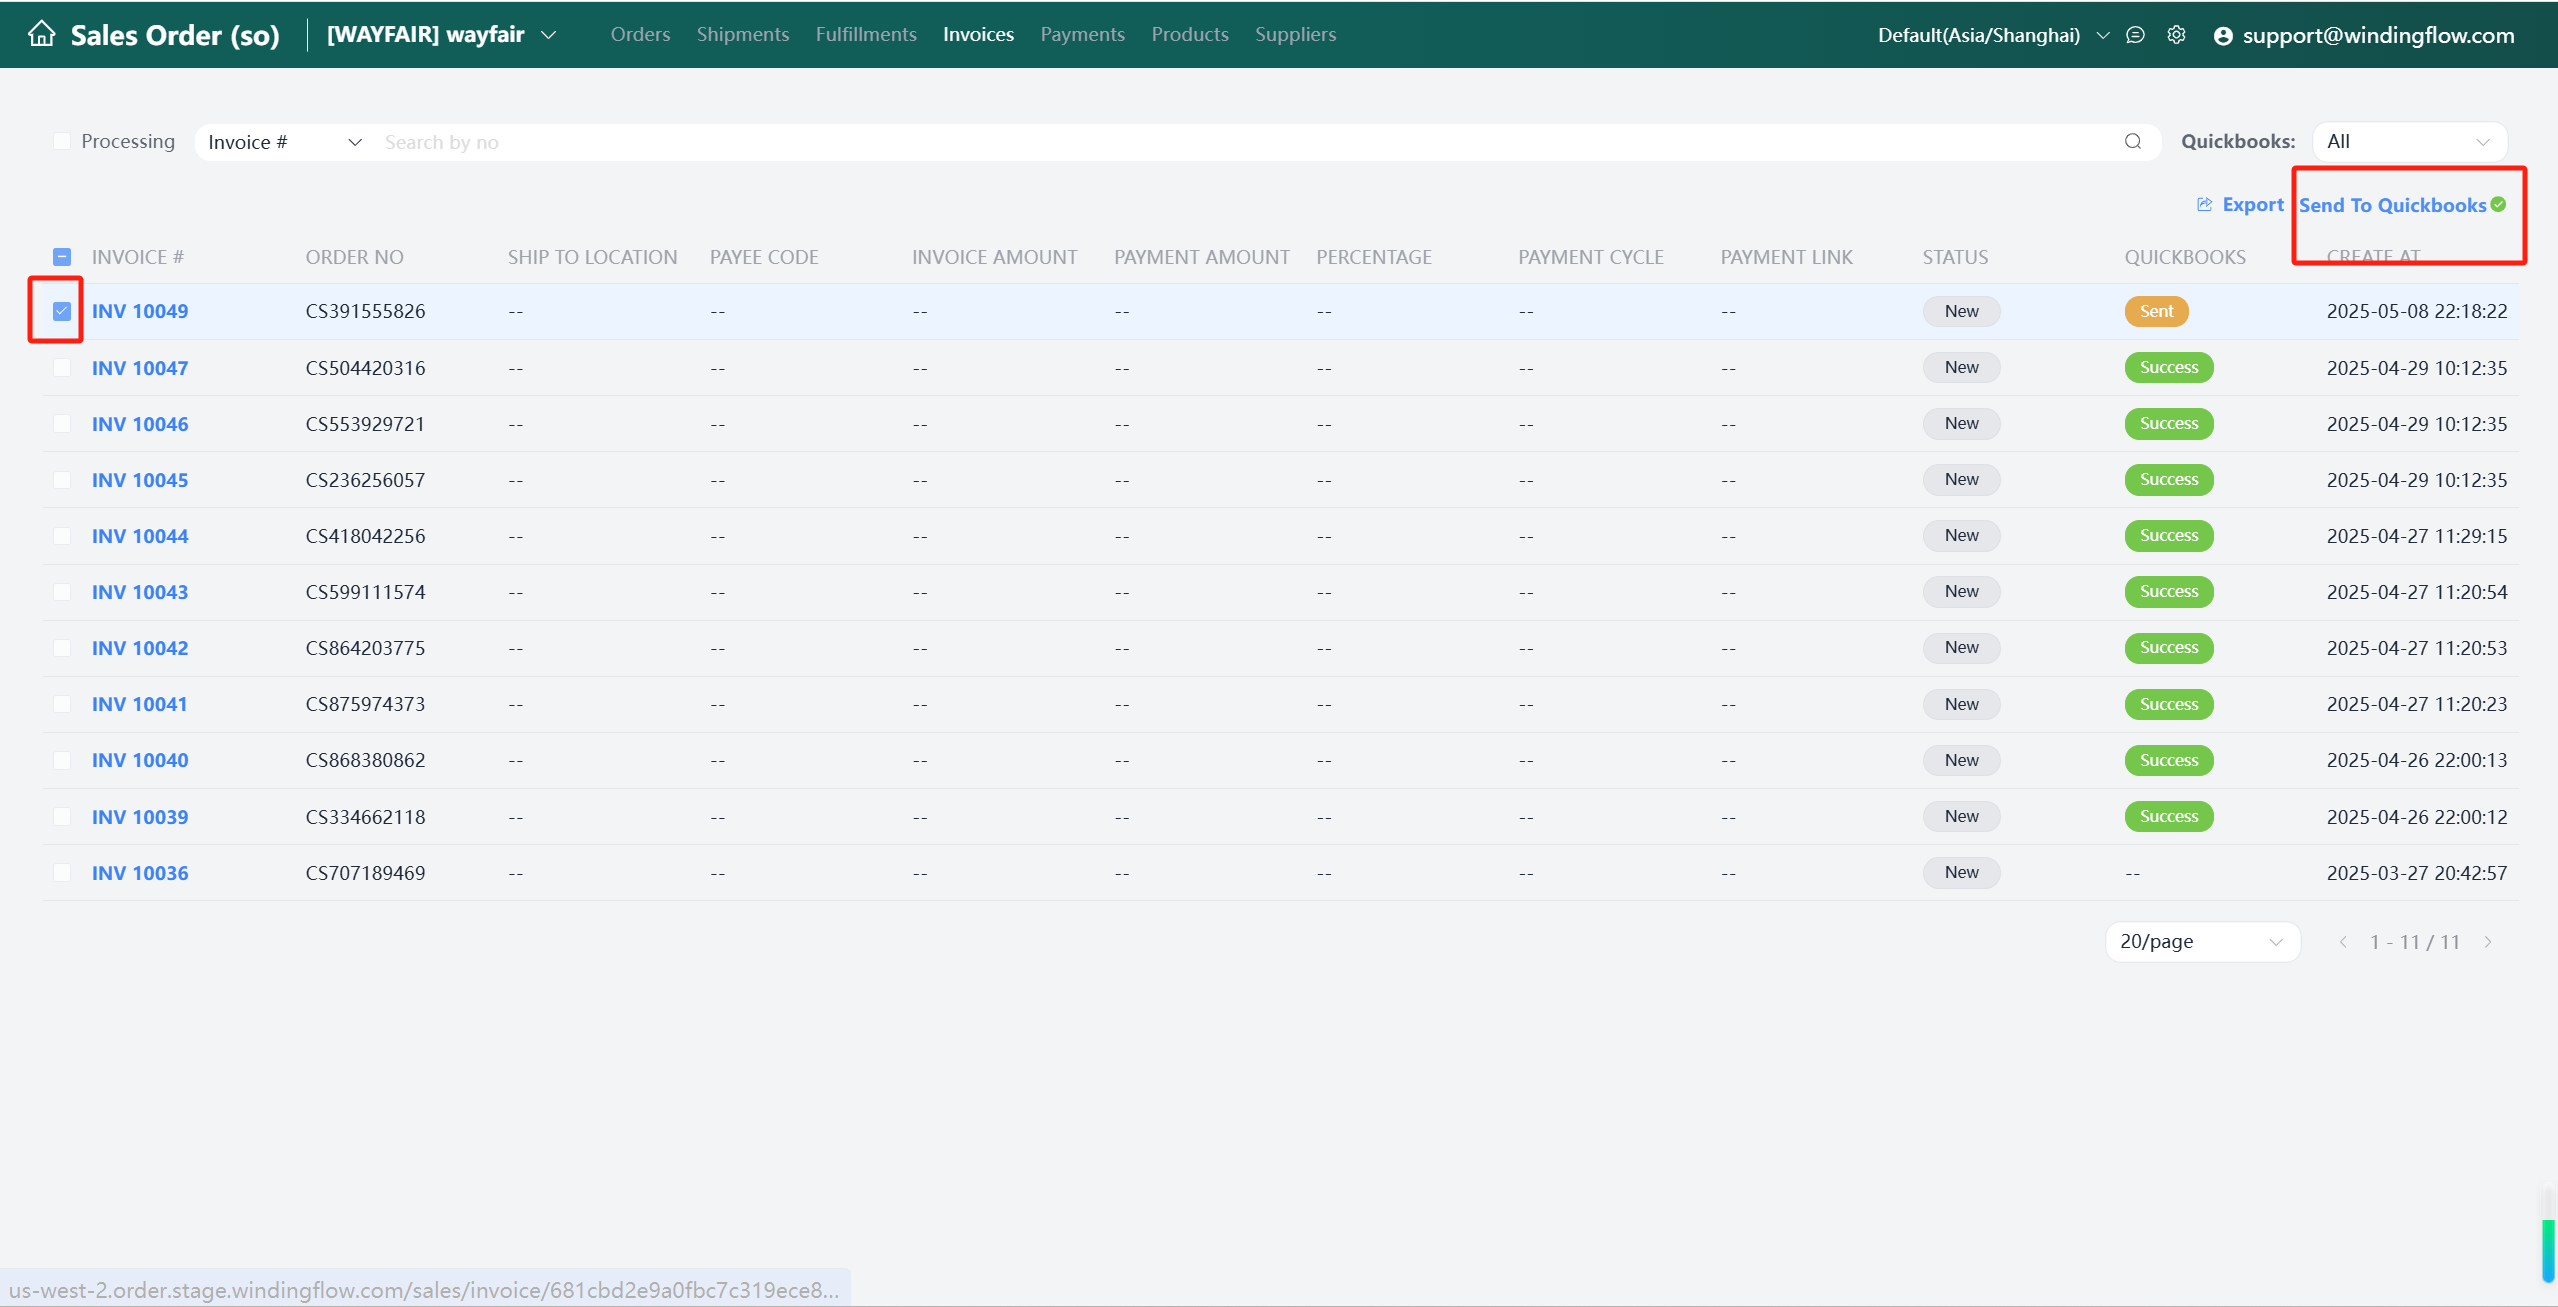
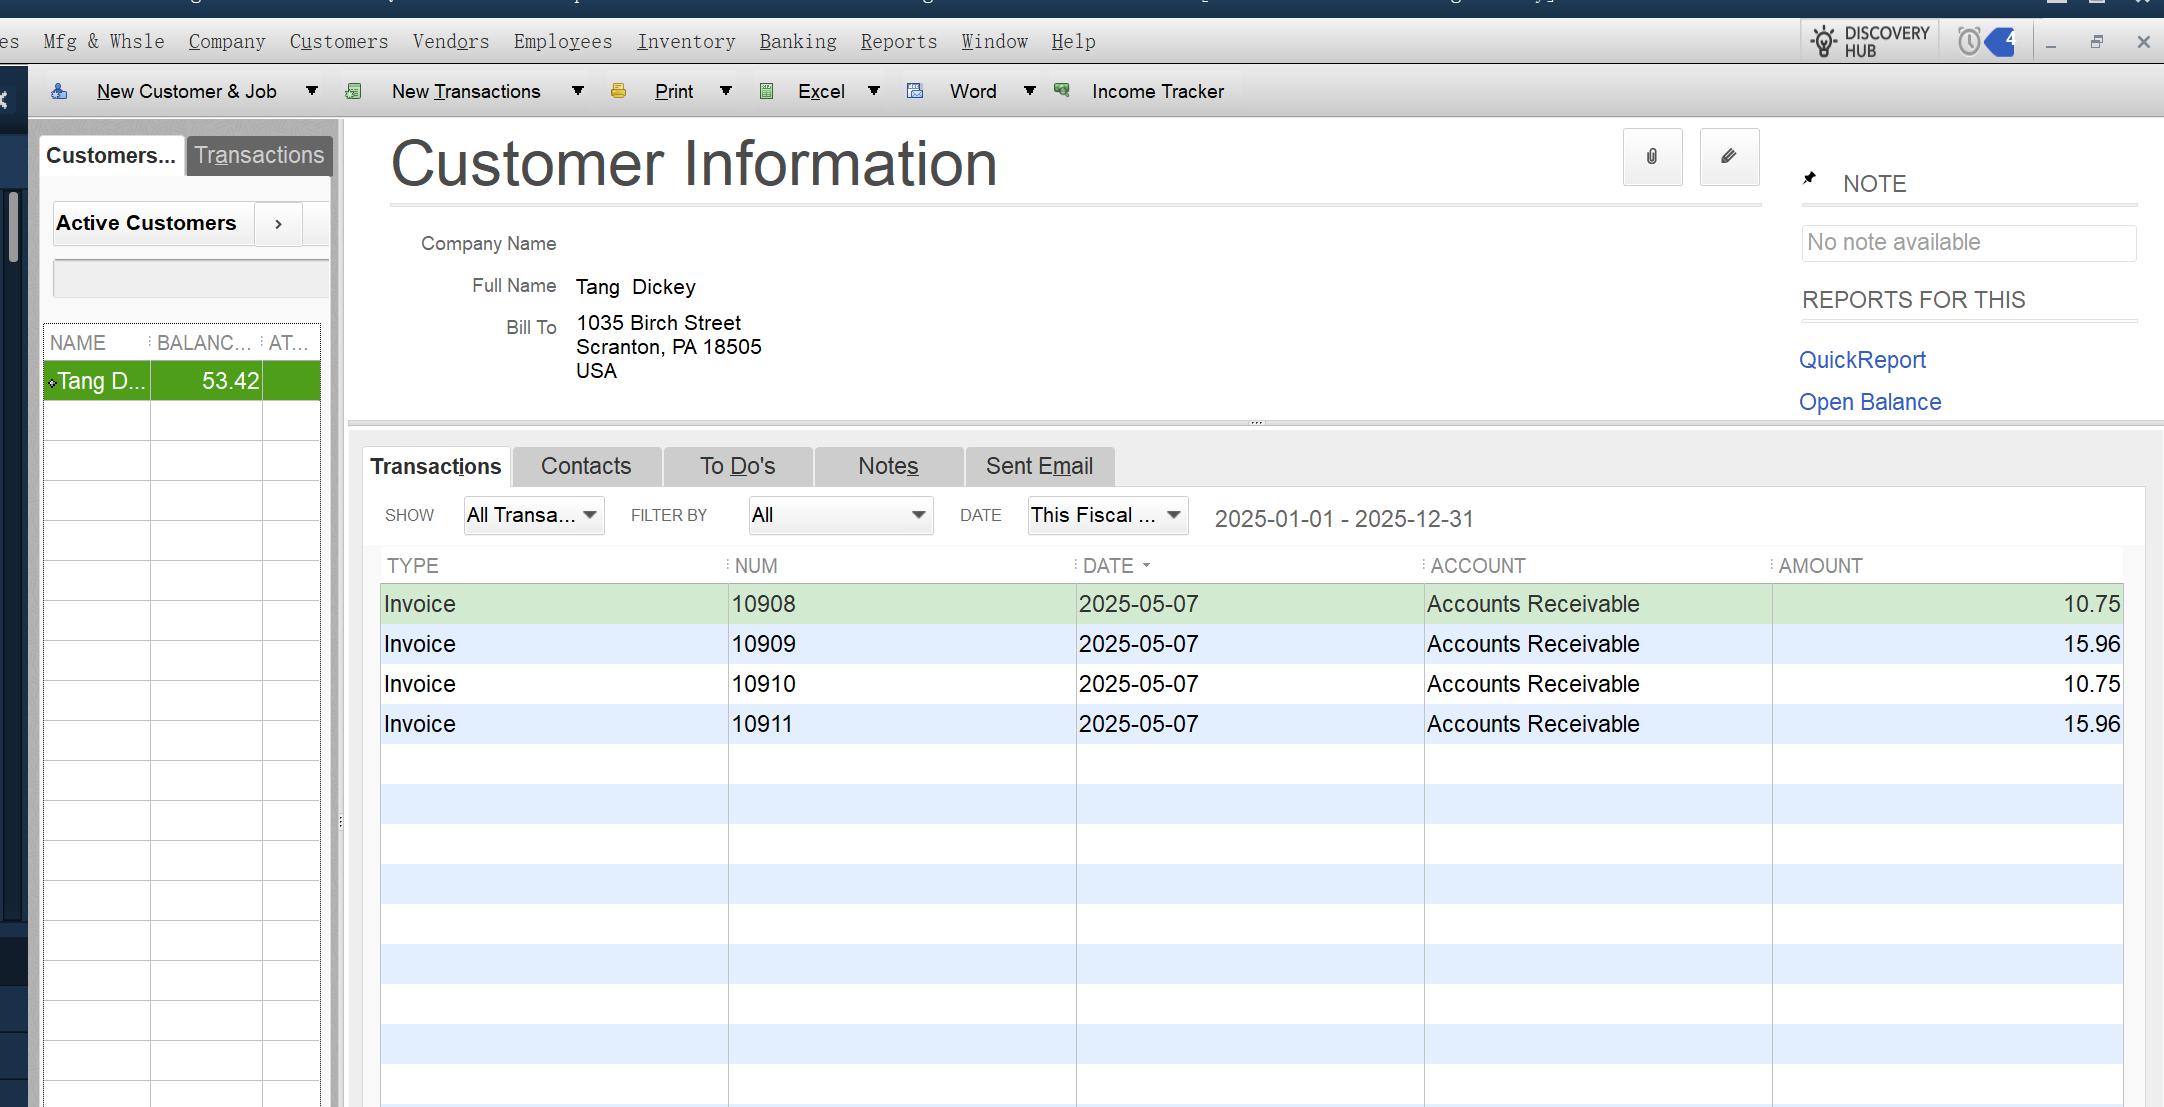
View the invoice in QuickBooks
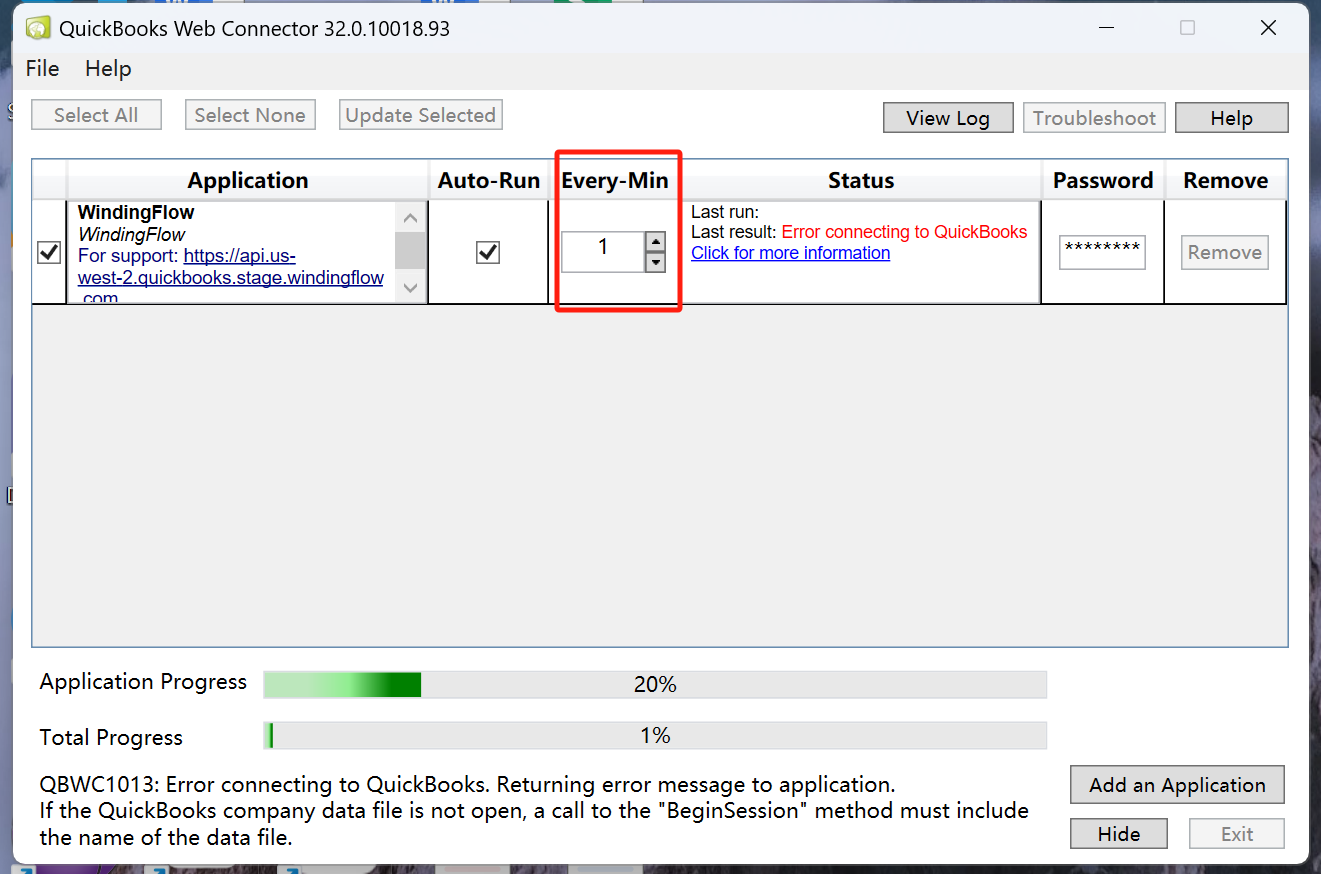
Step 8: Use and Monitor Web Connector
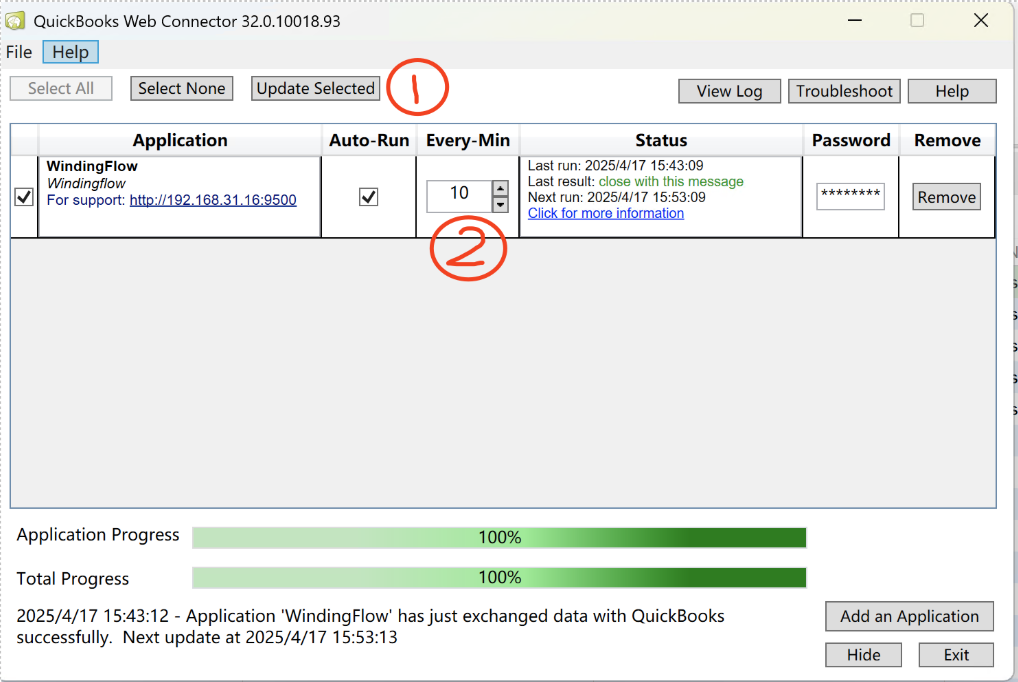
Exception Feedback
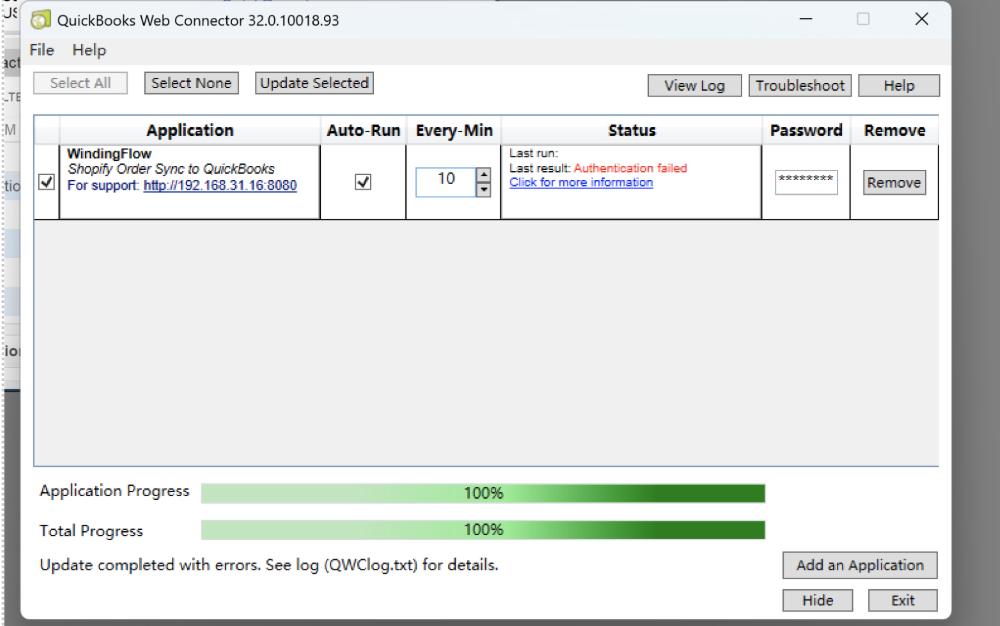
As the log is only recorded on the local computer, when an error occurs, please click view log, and then send the error information to us via email.

After completing the above steps, Windingflow and QuickBooks Desktop can achieve full integration for order automation, allowing sales orders to flow into your financial system with minimal effort.
Start your QuickBooks integration with Windingflow now!